Introduction
Imagine the joy of biting into a perfectly cooked pierogi, with its delicious filling wrapped in a soft, gluten-free dough that melts in your mouth. For those with gluten sensitivities or celiac disease, enjoying traditional pierogies can be a challenge. But fear not, as we bring you the ultimate guide to creating the best gluten-free pierogi dough right in your own kitchen.
Whether you have Polish roots or simply love exploring new flavors, making gluten-free pierogi dough opens up a world of culinary possibilities. This recipe is not just about dietary restrictions; it’s about savoring the comfort and flavors of a classic dish with a gluten-free twist.
Throughout history, pierogies have been a staple in Eastern European cuisine, offering a versatile canvas for both savory and sweet fillings. By mastering the art of gluten-free pierogi dough, you can recreate this beloved dish with a modern, health-conscious twist.
Join us on this culinary journey as we delve into the intricacies of crafting the perfect gluten-free pierogi dough that will impress your taste buds and leave you wanting more.
Why You’ll Love This Recipe
Creating gluten-free pierogi dough is a rewarding experience that opens up a world of culinary possibilities. Here’s why you’ll love this recipe:
This dough is easy to work with, allowing you to shape and fill your pierogies effortlessly.
It yields a soft and pliable texture that results in perfectly cooked pierogies every time.
Being gluten-free, this dough caters to individuals with dietary restrictions without compromising on taste or texture.
By making your own gluten-free pierogi dough, you can customize the fillings to suit your preferences and dietary needs.
Ingredients
To make the best gluten-free pierogi dough, you will need the following ingredients:
1. Gluten-free all-purpose flour blend
2. Xanthan gum
3. Salt
4. Eggs
5. Sour cream or Greek yogurt
6. Butter
7. Water
Feel free to explore different flour blends and dairy-free alternatives to suit your taste and dietary requirements.
Step-by-Step Instructions
1. In a large mixing bowl, combine the gluten-free flour blend, xanthan gum, and salt. Mix well to ensure even distribution of ingredients.
2. Create a well in the center of the dry ingredients and add the eggs, sour cream, and softened butter. Mix until a dough starts to form.
3. Gradually add water to the dough, a little at a time, until it comes together into a smooth and slightly sticky ball.
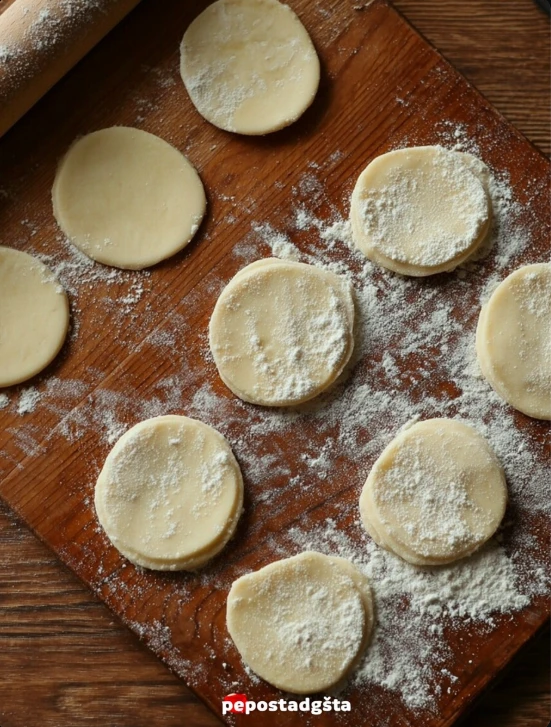
4. Divide the dough into smaller portions for easier rolling. Dust your work surface with gluten-free flour and roll out the dough to your desired thickness.
5. Cut out circles using a cookie cutter or a glass, place your favorite filling in the center of each circle, fold in half, and crimp the edges to seal.
6. Boil the pierogies until they float to the surface, then sauté in butter for a crispy finish. Serve hot and enjoy!
Expert Tips for Success
• Ensure your ingredients are at room temperature to help the dough come together smoothly.
• Use a kitchen scale to measure the flour accurately for the best results.
• If the dough feels too sticky, add a sprinkle of gluten-free flour until it reaches the right consistency.
• Experiment with different fillings, from traditional potato and cheese to sweet fruit fillings for a dessert twist.
Variations and Substitutions
• For a dairy-free version, substitute the sour cream and butter with plant-based alternatives.
• Add herbs or spices to the dough for an extra flavor boost.
• Explore different gluten-free flour blends to find your preferred taste and texture.
• Make mini pierogies for bite-sized appetizers or party snacks.
Serving Suggestions
Serve your gluten-free pierogies with a dollop of sour cream, a sprinkle of fresh herbs, or a drizzle of melted butter. Pair them with a crisp salad, sautéed vegetables, or a flavorful dipping sauce for a complete meal experience.
For a traditional touch, sauté onions until caramelized and serve them on top of the pierogies for added flavor and texture.
FAQs
Q: Can I freeze the uncooked pierogies?
A: Yes, you can freeze the assembled pierogies on a baking sheet before transferring them to a freezer-safe bag. Cook them directly from frozen when ready to enjoy.
Q: How long do cooked pierogies last?
A: Cooked pierogies can be stored in the refrigerator for up to 3 days. Reheat them by sautéing in butter or reheating in the microwave.
Q: Can I bake the pierogies instead of boiling them?
A: While boiling is the traditional method, you can bake the pierogies for a healthier alternative. Brush them with oil and bake until golden and crispy.
Final Thoughts
Mastering the art of gluten-free pierogi dough opens up a world of culinary delights for you and your loved ones. Whether you have dietary restrictions or simply enjoy exploring new flavors, this recipe offers a delicious and versatile way to enjoy a classic dish with a modern twist.
So, roll up your sleeves, gather your ingredients, and embark on a culinary adventure that will delight your senses and fill your kitchen with the aroma of freshly cooked pierogies. Get ready to savor each bite and create lasting memories around the dining table with your homemade gluten-free pierogies.
Best Gluten-Free Pierogi Dough
Enjoy the classic flavors of pierogies with a gluten-free twist by mastering the art of crafting the perfect gluten-free pierogi dough. This soft and pliable dough is easy to work with and results in delicious pierogies every time.
Ingredients
- 2 cups gluten-free all-purpose flour blend
- 1/2 teaspoon xanthan gum
- 1/2 teaspoon salt
- 2 eggs
- 1/2 cup sour cream or Greek yogurt
- 1/4 cup butter, softened
- 1/4 cup water
Directions
- In a large mixing bowl, combine the gluten-free flour blend, xanthan gum, and salt. Mix well.
- Create a well in the center of the dry ingredients and add the eggs, sour cream, and softened butter. Mix until a dough forms.
- Gradually add water to the dough, a little at a time, until it comes together into a smooth and slightly sticky ball.
- Divide the dough into smaller portions, roll out on a floured surface to desired thickness.
- Cut out circles, fill with desired filling, fold in half, and crimp the edges to seal.
- Boil the pierogies until they float, then sauté in butter for a crispy finish. Serve hot.