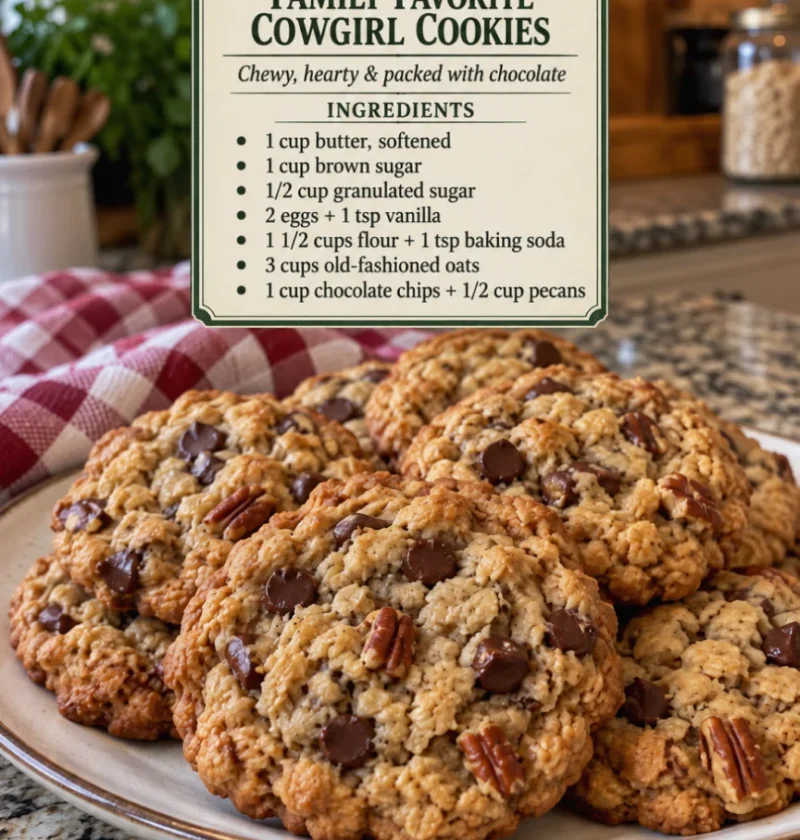
There’s something incredibly nostalgic about a warm, freshly baked cookie right out of the oven. The aroma wafting through the kitchen, the gooey chocolate chips melting against the soft cookie base—it’s a comfort food experience that brings families together. Among the plethora of cookie recipes, the Family Favorite Homemade Cowgirl Cookies stand out as a wholesome treat that embodies the spirit of home baking. These cookies combine the heartiness of oats with the sweetness of chocolate and a variety of other delightful ingredients, making them a cherished addition to any gathering or a simple family dessert. Not only are they delicious, but they also evoke feelings of warmth and love, reminiscent of carefree childhood days spent in the kitchen with loved ones. Originating in the American West, cowgirl cookies were traditionally made by families needing a hearty snack for long days on the ranch, blending convenience with wholesome ingredients. The combination of textures and flavors in these cookies makes them not just a snack, but a celebration of the simple joys of life. Each bite transports you to a place of comfort, making them perfect for sharing with friends and family.
Ingredients
To create these delightful cowgirl cookies, gather the following ingredients. Grouped logically, this list ensures that you won’t miss a single component in your baking adventure: You can learn more about this topic.
- Dry Ingredients:
- 2 1/4 cups all-purpose flour
- 1 cup rolled oats
- 1 teaspoon baking soda
- 1 teaspoon baking powder
- 1 teaspoon salt
- 1 cup brown sugar, packed
- 1/2 cup granulated sugar
- Wet Ingredients:
- 1 cup unsalted butter, softened
- 2 large eggs
- 1 teaspoon vanilla extract
- Toppings:
- 1 cup semi-sweet chocolate chips
- 1 cup chopped nuts (walnuts or pecans, optional)
- 1/2 cup shredded coconut (optional)
For best results, use high-quality ingredients: organic butter, fresh eggs, and premium chocolate chips will elevate the flavor of your cookies. If you’re looking to make substitutions, coconut oil can replace butter for a dairy-free option, and you can use gluten-free flour for those following a gluten-free diet. If you prefer a richer flavor, consider using dark brown sugar instead of light brown sugar, as it adds a touch of molasses that enhances the overall depth of flavor. Always opt for fresh, high-quality ingredients, as they contribute significantly to the final taste and texture of your Family Favorite Homemade Cowgirl Cookies. It’s also a good idea to check your baking powder and soda for freshness, as old leavening agents can lead to flat cookies. Check out our related guide for more tips on ingredient selection and enhancements, including sourcing organic produce and specialty items.
Steps / Instructions
- Preheat the Oven: Preheat your oven to 350°F (175°C). This ensures that your cookies bake evenly and come out perfectly golden brown. Ensure that the oven is fully preheated before placing your cookies inside for optimal results. You can use an oven thermometer to check the accuracy of your oven’s temperature, as uneven heating can affect the baking process, leading to cookies that are undercooked in some spots and overdone in others.
- Prepare Baking Sheets: Line two baking sheets with parchment paper. This will prevent the cookies from sticking and make for easier cleanup. Using parchment paper also helps achieve a crisp bottom while keeping the cookies soft and chewy on the inside. If you don’t have parchment paper, greasing the baking sheets lightly with butter or oil will also work, though it may alter the cookie’s texture slightly. Make sure to leave enough space between the cookies on the sheet to avoid overlapping during baking.
- Mix Dry Ingredients: In a large mixing bowl, combine the flour, oats, baking soda, baking powder, salt, brown sugar, and granulated sugar. Whisk them together until well incorporated. This step is crucial, as evenly mixing the dry ingredients allows for a consistent texture and taste throughout the cookies. Incorporating the leavening agents properly ensures that your cookies rise perfectly, giving them that ideal soft and chewy texture. Consider sifting the flour for a lighter mixture, which can add even more airiness to your final product.
- Blend Wet Ingredients: In another bowl, cream the softened butter until fluffy. Add in the eggs one at a time, mixing well after each addition to ensure they are fully incorporated. Stir in the vanilla extract until fully combined, and for an extra splash of flavor, consider adding a dash of almond extract. The creaming process is essential, as it incorporates air into the butter, making your cookies lighter and more tender. Aim for a light, creamy consistency; if the butter is too hard, it won’t blend efficiently, leading to a denser cookie.
- Combine Mixtures: Gradually add the dry ingredients to the wet mixture, stirring until just combined. Be careful not to overmix; a few lumps are perfectly fine! Overmixing can lead to tough cookies, whereas a gentle hand will yield tender, chewy results. Scrape down the sides of the bowl with a spatula to ensure all ingredients are mixed evenly without overworking the dough. The dough should be thick and ready to hold its shape when scooped.
- Fold in Toppings: Gently fold in the chocolate chips, nuts, and coconut, if using. These will add delightful textures and flavors to your cowgirl cookies. Ensure that the toppings are evenly distributed throughout the dough for a well-balanced cookie experience. This step also allows you to customize the flavor patterns throughout each cookie, ensuring that every bite is delicious. A great tip is to reserve a few chocolate chips to sprinkle on top of the cookies before baking for an appealing presentation.
- Scoop and Shape: Using a cookie scoop or tablespoon, drop rounded balls of dough onto the prepared baking sheets, leaving about 2 inches between each cookie. This spacing allows the cookies to spread without merging into one another, ensuring they maintain their individual shape. For uniform cookies, try using a cookie scoop of the same size for each scoop to guarantee even baking. You can also gently flatten the tops of the dough balls if you prefer a slightly larger, flatter cookie.
- Bake: Bake in the preheated oven for 10 to 12 minutes, or until the edges are lightly golden and the centers look set but slightly soft. They will firm up as they cool. Keep an eye on the cookies towards the end of the baking time; ovens can vary, and you want to catch them at just the right moment! If you find that your cookies are browning too quickly on the edges, consider rotating the baking sheets halfway through baking for even cooking. Let them cool for a minute on the baking sheet before transferring for better shape retention.
- Cool: Allow the cookies to cool on the baking sheets for about 5 minutes before transferring them to wire racks to cool completely. This step is crucial for the perfect texture, as the residual heat continues to bake the cookies slightly while they cool, achieving that perfect chewiness you’ve been aiming for. Cooling them on racks allows for air circulation, preventing sogginess. If you’re in a hurry, you can speed up the cooling process by placing the baking sheets in a cool area or using a fan to circulate air around the cookies.
Tips & Tricks
When it comes to baking the perfect cowgirl cookies, a few extra tips can make all the difference:
- Storage: Store your cookies in an airtight container at room temperature for up to one week. If you want to keep them fresh longer, consider refrigerating or freezing them. For freezing, place the cookies in a single layer in a freezer-safe bag or container, and separate layers with parchment paper to prevent sticking. When ready to enjoy, simply thaw at room temperature or pop them in the microwave for a few seconds to regain that fresh-baked warmth. Wrapping individual cookies in plastic wrap before freezing can help preserve their moisture.
- Make-Ahead: You can prepare the dough ahead of time and refrigerate it for up to 2 days. Just scoop and bake when you’re ready for fresh cookies! This also allows the flavors to meld, potentially enhancing the overall taste. To save time, you can also pre-scoop the dough into balls and freeze them, then bake directly from frozen, adding a minute or two to the baking time. This way, you can always have a warm cookie treat ready to go.
- Common Mistakes to Avoid: Make sure your butter is softened but not melted for the best texture. Additionally, measuring flour accurately is essential; too much can result in dry cookies. Always spoon the flour into your measuring cup and level it off with a knife for precision. Another tip is to let your eggs come to room temperature before using them, as this can help with the emulsification in the batter. Lastly, avoid opening the oven door too frequently, as it can cause temperature fluctuations that affect baking.
- Baking Tip: If you prefer a chewier cookie, try underbaking them slightly. They will continue cooking on the baking sheet after you remove them from the oven. Keep in mind that cookies should look slightly underdone in the center; they will firm up as they cool. Experimenting with baking time will help you find your perfect balance of chewy and crunchy. For added fun, try using a combination of chocolate chips, like dark and white, to create a more complex flavor profile.
Conclusion
The Family Favorite Homemade Cowgirl Cookies recipe is not just about creating a sweet treat; it’s about creating memories, sharing joy, and indulging in a comforting dessert that feels like home. Whether it’s a family gathering or an afternoon snack, these cookies offer a delightful taste of nostalgia and warmth. So, roll up your sleeves, gather the family, and get ready to bake a batch of cookies that will soon become a beloved tradition in your household. Each bite is a reminder of the simple pleasures of life, and we hope these cookies bring as much joy to your home as they have to countless others. We invite you to share your baking experience, any tweaks to the recipe, or your favorite moments associated with these cherished cookies!
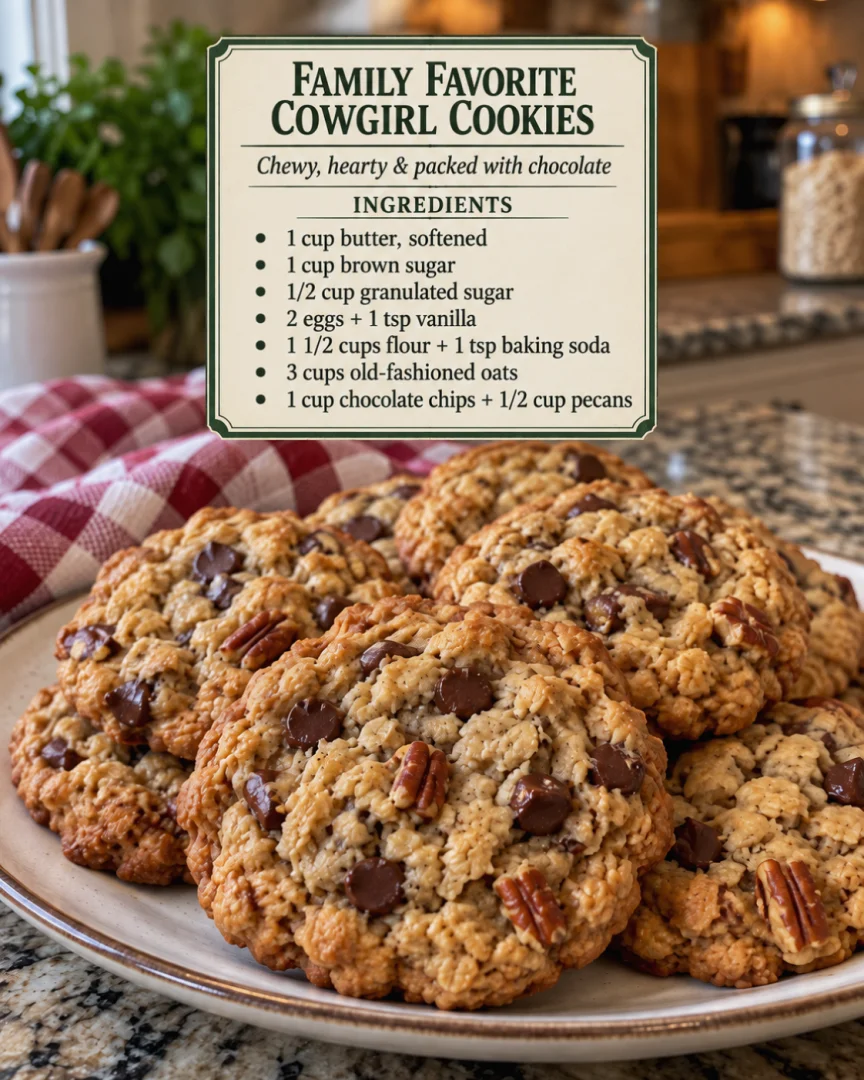
Family Favorite Homemade Cowgirl Cookies
These cookies combine the heartiness of oats with the sweetness of chocolate and a variety of other delightful ingredients, making them a cherished addition to any gathering or a simple family dessert.
Ingredients
- 2 1/4 cups all-purpose flour
- 1 cup rolled oats
- 1 teaspoon baking soda
- 1 teaspoon baking powder
- 1 teaspoon salt
- 1 cup brown sugar, packed
- 1/2 cup granulated sugar
- 1 cup unsalted butter, softened
- 2 large eggs
- 1 teaspoon vanilla extract
- 1 cup semi-sweet chocolate chips
- 1 cup chopped nuts (walnuts or pecans, optional)
- 1/2 cup shredded coconut (optional)
Directions
Preheat your oven to 350°F (175°C).
Line two baking sheets with parchment paper.
In a large mixing bowl, combine the flour, oats, baking soda, baking powder, salt, brown sugar, and granulated sugar.
In another bowl, cream the softened butter until fluffy. Add in the eggs one at a time, mixing well after each addition. Stir in the vanilla extract.
Gradually add the dry ingredients to the wet mixture, stirring until just combined.
Gently fold in the chocolate chips, nuts, and coconut, if using.
Using a cookie scoop or tablespoon, drop rounded balls of dough onto the prepared baking sheets, leaving about 2 inches between each cookie.
Bake in the preheated oven for 10 to 12 minutes, or until the edges are lightly golden and the centers look set but slightly soft.
Allow the cookies to cool on the baking sheets for about 5 minutes before transferring them to wire racks to cool completely.
Nutrition Facts
Recipe Reviews
- ★★★★★
Excellent recipe!
Leave a Reply
Your email address will not be published. Required fields are marked *