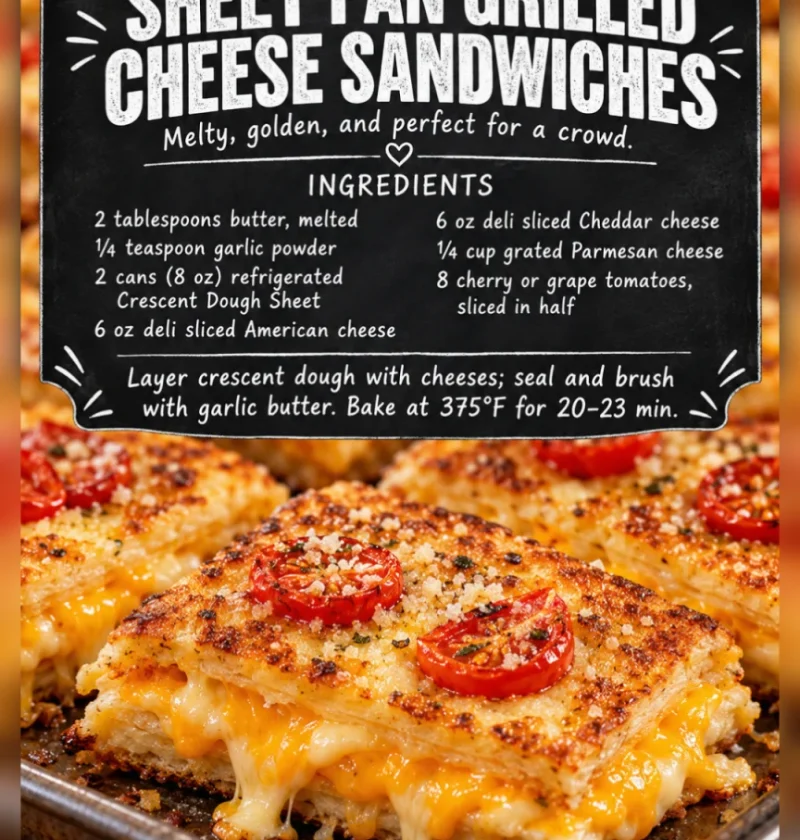
One of the most beloved comfort foods in American cuisine is undoubtedly the grilled cheese sandwich. Simple yet satisfying, it evokes nostalgia and brings a sense of warmth to every bite. However, have you ever considered taking this classic dish to the next level with sheet-pan cooking? Introducing sheet-pan grilled cheese sandwiches! This method allows you to whip up multiple sandwiches at once, making it perfect for family lunches, gatherings, or even a quick weeknight dinner. With the right blend of cheeses and a few creative twists, these sandwiches can become gourmet delights that tantalize your taste buds. The beauty of this recipe lies not only in its simplicity but also in its versatility, allowing you to customize each sandwich according to your personal preferences. Plus, who doesn’t love a meal that can be prepared in one pan? You’ll save time on both cooking and cleanup, which is always a win in any busy kitchen! Imagine serving a plateful of these golden, cheesy creations to friends or family, all while enjoying the delightful aroma that fills your kitchen. It’s a comforting experience that resonates with many, evoking fond memories of childhood lunches or cozy dinners. The joy of pulling apart a perfectly melted grilled cheese sandwich is something that transcends generations, making it an enduring favorite in households across America.
Ingredients
Here’s what you’ll need to create delicious sheet-pan grilled cheese sandwiches: You can learn more about this topic. Each ingredient contributes to the overall flavor and texture, so selecting high-quality items is paramount for the best results. Using fresh ingredients not only enhances the taste but also ensures a delightful texture that is key to a perfect grilled cheese sandwich. Freshly baked bread, in particular, will make all the difference, providing a satisfying crunch and flavor profile that will elevate your meal.
- Bread: 8 slices of sourdough or your choice of sturdy bread, like whole grain or ciabatta. Choose a bread with a good crust to help maintain the structure and hold the fillings without becoming soggy. The bread’s flavor also plays an essential role in the overall taste of the sandwich, so consider options that have a slight tang or nuttiness. Sourdough, for instance, offers a delightful zest that pairs beautifully with the richness of the cheese.
- Butter: 1/2 cup (1 stick), softened. Using real butter will enhance the flavor significantly. For a healthier option, you can use olive oil or vegan butter, but be sure to adjust the quantities as needed to ensure each slice is adequately coated for that perfect golden hue. The butter’s role in achieving that crispy, golden crust cannot be overstated; it’s the secret to a mouthwatering finish.
- Cheese:
- 2 cups shredded sharp cheddar cheese, ideally freshly grated for optimal melting and flavor. Freshly grated cheese creates a creamier texture compared to pre-shredded varieties, which often contain anti-caking agents that can affect melting. Sharp cheddar’s bite complements the richness of the other ingredients beautifully.
- 1 cup shredded mozzarella cheese, which adds a stretchy texture that is perfect for cheesiness and creates that signature pull when you take a bite. Mozzarella’s mild flavor allows the sharper notes of cheddar to shine through.
- 1 cup crumbled feta cheese, providing a tangy contrast to the richness of the other cheeses, adding complexity to each bite. The crumbly texture of feta breaks through the creaminess, creating a delightful mouthfeel.
- Optional Add-Ins: These ingredients can take your sandwiches to the next level. Customize your flavor profile by including:
- 1/2 cup cooked bacon, chopped, for added savory goodness. This crispy element can elevate the dish and satisfy meat lovers, providing a delightful crunch that contrasts with the creamy cheese.
- 1/2 cup caramelized onions, which bring a natural sweetness and depth of flavor, complementing the saltiness of the cheese beautifully. The slow cooking of onions enhances their natural sugars, making them a perfect addition.
- 1/4 cup fresh basil leaves, adding a refreshing herbaceous note that brightens the overall experience. The aromatic quality of basil pairs wonderfully with the rich cheeses, enhancing the overall taste profile.
- Seasoning:
- Salt and pepper to taste, enhancing the overall flavor of your sandwich. A little seasoning goes a long way in bringing out the flavors of the ingredients. Be mindful of the saltiness of cheese when seasoning each layer.
- 1 teaspoon garlic powder (optional), for an additional layer of savory flavor that pairs exceptionally well with cheese. Garlic powder adds a depth that elevates the entire dish.
For variety, consider using different types of cheese such as Gruyère, Gouda, or even blue cheese to explore your customizable grilled cheese flavors. Each cheese brings its own unique melting characteristics and taste profiles, allowing you to experiment with your favorites. The interplay of flavors can create an entirely different experience with each combination. Check out our related guide for more tips and to enhance your grilled cheese sandwich experience. Remember, the quality of the ingredients can transform a simple sandwich into a culinary delight, making the effort well worth it.
Steps / Instructions
- Preheat the Oven: Preheat your oven to 400°F (200°C). This temperature is key to achieving that perfectly toasted bread while ensuring the cheese melts beautifully. A hot oven ensures that you get that desirable crispiness on the outside while maintaining a gooey interior. Allowing the oven to fully preheat is crucial for even cooking.
- Prepare the Baking Sheet: Line a large sheet pan with parchment paper to prevent sticking and for easy cleanup. This will also help in evenly distributing the heat across the sandwiches, ensuring consistent cooking throughout. The parchment paper can also aid in achieving a perfectly crispy crust without the mess.
- Assemble the Sandwiches:
- Spread a generous layer of softened butter on one side of each slice of bread. The butter not only adds flavor but also helps achieve that golden crust that everyone loves. Don’t be shy with the butter; a good layer is essential for crunch. Make sure to cover the entire surface for maximum flavor.
- Arrange half of the bread slices, buttered side down, on the prepared sheet pan. Make sure to place them close together to maximize space, allowing for a more even toasting process. This placement helps every sandwich benefit from the oven’s heat effectively.
- Sprinkle a blend of cheddar, mozzarella, and feta cheese over each slice of bread on the sheet. Ensure even coverage for a gooey experience with every bite, and don’t hesitate to pile it on if you love cheese! Layering the cheese allows for a melty, indulgent center.
- If using, add any optional ingredients such as bacon, caramelized onions, or basil on top of the cheese. Layering these ingredients can create a delightful surprise in every sandwich, enhancing the flavor profile significantly. Each addition can contribute its unique texture and taste, making every bite an adventure.
- Cover with the remaining slices of bread, buttered side up. Press down gently to compress the sandwiches slightly; this helps them toast uniformly and prevents them from being too airy. A gentle press can also help the cheese melt more thoroughly.
- Bake the Sandwiches: Place the sheet pan in the preheated oven and bake for about 10 minutes. Keep an eye on them, as oven temperatures can vary, and you want to catch them before they get too brown. The aroma will start to fill your kitchen, signaling that they’re on their way to deliciousness.
- Flip for Even Crispiness: After 10 minutes, carefully flip each sandwich using a spatula. This step is crucial for achieving that evenly crispy texture on both sides. Bake for another 10-15 minutes, or until the bread is golden brown and the cheese is melted, bubbly, and oozing out, creating that irresistible gooeyness. The visual cue of bubbling cheese is often a good indicator that your sandwiches are perfectly done.
- Cool and Slice: Remove the sheet pan from the oven and let the sandwiches cool for a minute. Slicing them diagonally not only makes them easier to handle but also enhances their visual appeal, making them perfect for serving at gatherings. The steam released upon cutting will reveal the gooey interior, enticing everyone around.
Keeping an eye on the sandwiches during the last few minutes of baking will help achieve that perfectly crispy grilled cheese sandwich texture, ensuring you don’t miss that golden-brown perfection that everyone loves. This attention to detail is what takes your sheet-pan grilled cheese sandwiches from simple to sensational! Enjoy the satisfaction that comes from creating a dish that is both familiar and exciting.
Tips & Tricks
- Storage: If you have leftovers, store them in an airtight container in the refrigerator for up to 3 days. Reheat in a skillet over medium heat for the best texture, making sure to cover them to retain moisture, which prevents them from drying out. Alternatively, you can reheat them in the oven at a low temperature to keep the crust crispy.
- Make-Ahead Option: Assemble the sandwiches up to a day in advance, but wait to butter the bread until you are ready to bake. This helps prevent the bread from becoming soggy and allows for a fresher-tasting sandwich when it’s time to cook. Assemble sandwiches without butter and store them in the fridge to save time on busy days.
- Avoiding Soggy Bread: Choose a bread that is thick enough to hold up against the moisture from the melted cheese and any additional ingredients. Stale bread works well, too, as it absorbs less moisture, leading to a crunchier sandwich. A well-toasted bread acts as a barrier to moisture penetration.
- Flavor Enhancements: Experiment with adding spices like cayenne pepper or smoked paprika to the butter for a subtle kick. You might also consider incorporating fresh herbs or different types of mustards for unique flavor profiles, elevating your grilled cheese experience significantly. A sprinkle of fresh herbs just before serving can add a burst of color and flavor.
Conclusion
Sheet-pan grilled cheese sandwiches redefine the traditional approach to making this quintessential comfort food. With minimal effort and maximum flavor, they are not only perfect for family meals but can also serve as a delightful party appetizer idea. As you experiment with different cheeses and toppings, you’ll discover exciting new combinations that will impress your family and friends. Don’t forget to serve these cheesy wonders with classic tomato soup for a comforting meal that warms the heart and soul. Enjoy the process, and indulge in the delightful experience of creating these easy grilled cheese recipes! Embrace the creativity and flavors that come with crafting your version of this beloved dish. The joy of cooking, coupled with the satisfaction of enjoying a well-made sandwich, makes this dish a favorite for many.
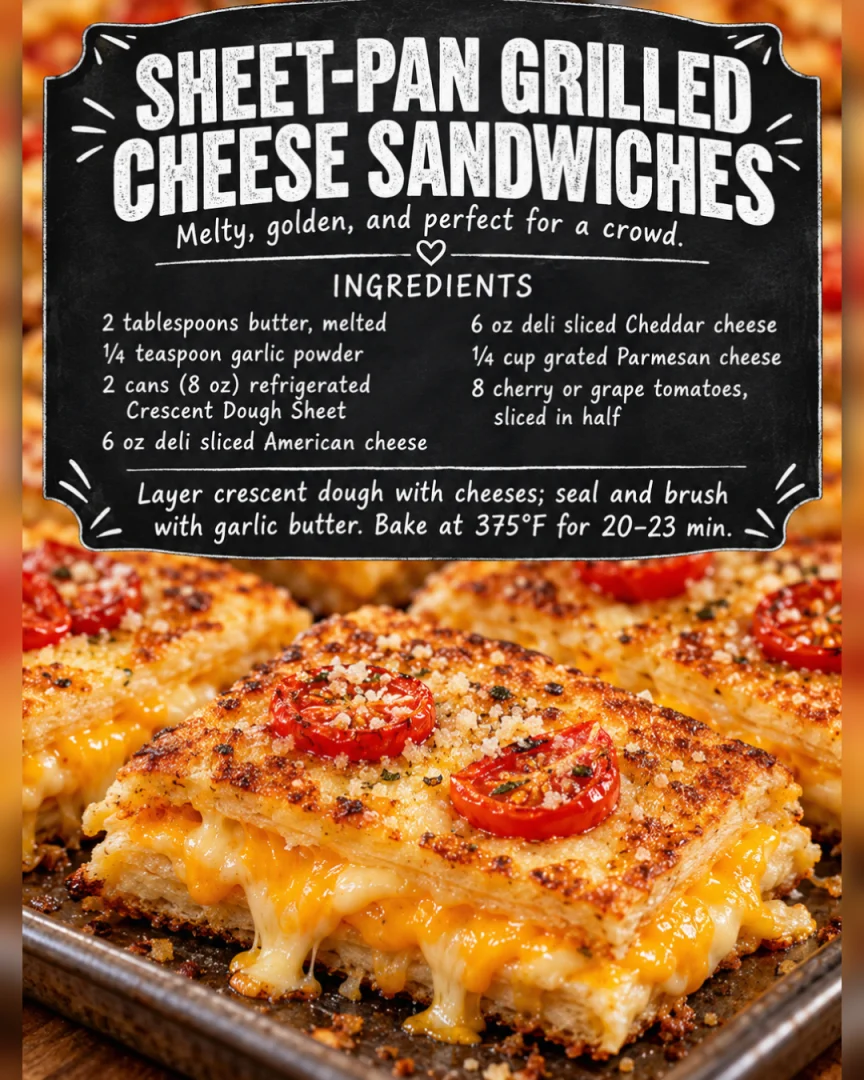
Sheet-Pan Grilled Cheese Sandwiches
One of the most beloved comfort foods in American cuisine is undoubtedly the grilled cheese sandwich. Simple yet satisfying, it evokes nostalgia and brings a sense of warmth to every bite. Introducing sheet-pan grilled cheese sandwiches! This method allows you to whip up multiple sandwiches at once, making it perfect for family lunches, gatherings, or even a quick weeknight dinner.
Ingredients
- 8 slices of sourdough or your choice of sturdy bread
- 1/2 cup (1 stick) softened butter
- 2 cups shredded sharp cheddar cheese
- 1 cup shredded mozzarella cheese
- 1 cup crumbled feta cheese
- 1/2 cup cooked bacon, chopped (optional)
- 1/2 cup caramelized onions (optional)
- 1/4 cup fresh basil leaves (optional)
- Salt and pepper to taste
- 1 teaspoon garlic powder (optional)
Directions
Preheat your oven to 400°F (200°C).
Line a large sheet pan with parchment paper.
Spread a generous layer of softened butter on one side of each slice of bread.
Arrange half of the bread slices, buttered side down, on the prepared sheet pan.
Sprinkle a blend of cheddar, mozzarella, and feta cheese over each slice of bread.
If using, add any optional ingredients such as bacon, caramelized onions, or basil on top of the cheese.
Cover with the remaining slices of bread, buttered side up, and press down gently.
Nutrition Facts
Recipe Reviews
- ★★★★★
Excellent recipe!
Leave a Reply
Your email address will not be published. Required fields are marked *