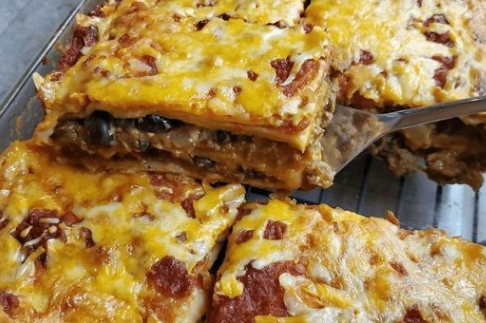
Baked Ravioli is a hearty and comforting dish that combines the delicious flavors of cheese-filled ravioli, savory marinara sauce, and melted cheese. This easy-to-make recipe is perfect for a weeknight dinner or a cozy weekend meal. With ground beef and a blend of herbs, this baked ravioli is sure to satisfy your cravings and become a family favorite. Let’s dive into the recipe and learn how to create this mouthwatering Baked Ravioli step-by-step.
Ingredients
- 1 (25 oz) package frozen cheese ravioli
- 1 (24 oz) jar marinara or spaghetti sauce
- 1 lb ground beef
- 1 teaspoon dried basil
- 1 tablespoon minced garlic
- 1/2 teaspoon dried parsley
- 8 oz shredded mozzarella cheese
- 1/4 cup Parmesan cheese
Instructions
Step 1: Prepare the Ground Beef
- Preheat Oven: Preheat your oven to 375°F (190°C).
- Cook Ground Beef: In a large skillet over medium heat, cook the ground beef until browned and fully cooked, about 5-7 minutes. Drain any excess fat.
- Add Garlic and Herbs: Add the minced garlic, dried basil, and dried parsley to the skillet. Cook for an additional 2-3 minutes, stirring frequently until the garlic is fragrant.
Step 2: Combine Sauce and Beef
- Add Marinara Sauce: Pour the marinara or spaghetti sauce into the skillet with the cooked beef mixture. Stir well to combine and let it simmer for a few minutes to blend the flavors.
Step 3: Assemble the Dish
- Layer Ravioli and Sauce: Spread a thin layer of the meat sauce on the bottom of a 9×13-inch baking dish. Arrange half of the frozen cheese ravioli in a single layer over the sauce.
- Add Cheese: Sprinkle half of the shredded mozzarella cheese over the ravioli.
- Repeat Layers: Repeat the layers by adding another layer of the meat sauce, the remaining ravioli, and the remaining mozzarella cheese.
- Top with Parmesan: Sprinkle the grated Parmesan cheese evenly over the top layer of mozzarella.
Step 4: Bake the Ravioli
- Cover and Bake: Cover the baking dish with aluminum foil and bake in the preheated oven for 20 minutes.
- Remove Foil: Remove the foil and bake for an additional 15-20 minutes, or until the cheese is melted and bubbly and the ravioli are cooked through.
Step 5: Serve
- Cool and Serve: Let the baked ravioli cool for a few minutes before serving. Enjoy this delicious and comforting meal with a side salad or garlic bread.
Cooking Notes
- Ravioli: There is no need to thaw the frozen ravioli before baking. They will cook perfectly in the oven.
- Cheese: Feel free to use a combination of cheeses such as mozzarella, provolone, or even a bit of ricotta for extra creaminess.
- Herbs: Fresh herbs can be substituted for dried herbs. Use three times the amount of fresh herbs as dried.
Frequently Asked Questions
Q: Can I use a different type of ravioli? A: Yes, you can use any type of ravioli you prefer, such as spinach and ricotta, beef, or mushroom. Adjust the cooking time as needed.
Q: How do I store leftovers? A: Store any leftover baked ravioli in an airtight container in the refrigerator for up to 3 days. Reheat in the oven or microwave until warmed through.
Q: Can I make this dish ahead of time? A: Yes, you can assemble the dish ahead of time, cover it with foil, and refrigerate for up to 24 hours before baking. Add an extra 10-15 minutes to the baking time if baking from cold.
Keto/Low Carb Version
To make a keto or low-carb version of Baked Ravioli, follow these modifications:
- Ravioli: Use a low-carb or keto-friendly pasta substitute such as zucchini slices or cauliflower florets.
- Sauce: Ensure the marinara or spaghetti sauce is low in sugar or make your own keto-friendly sauce.
- Cheese: Use full-fat cheese to keep the dish low in carbs.
Baked Ravioli is a simple yet delicious dish that’s perfect for any occasion. With its rich flavors and comforting textures, it’s sure to become a favorite in your household. Try this recipe today and enjoy a hearty, homemade meal that’s easy to prepare and sure to please everyone!
Did you enjoy this Baked Ravioli recipe? Share your experience in the comments below and tag us on social media with your delicious creations! For more mouthwatering and easy recipes, subscribe to our blog and follow us for the latest updates. Happy cooking