Easy Homemade Chocolate Ice Cream Recipe with Only 3 Ingredients
Indulge in the creamy, rich flavors of homemade chocolate ice cream with this simple and delicious recipe. With just three ingredients, you can create a decadent treat that will satisfy your sweet cravings and impress your family and friends. Say goodbye to store-bought ice cream and hello to the irresistible taste of homemade goodness!
Are you ready to elevate your dessert game with a decadent and indulgent treat? Look no further than this easy homemade chocolate ice cream recipe! With just three simple ingredients, you can whip up a batch of creamy, rich chocolate ice cream that will rival any store-bought variety. Whether you’re hosting a summer barbecue, celebrating a special occasion, or simply craving a sweet treat, this homemade ice cream is sure to delight your taste buds and leave you wanting more.
Ingredients:
- Sweetened condensed milk
- Dark chocolate (at least 70% cocoa)
- Double cream (also known as heavy cream)
Instructions:
- Prepare the Ingredients:
- Begin by preparing the ingredients. Measure out the sweetened condensed milk, dark chocolate, and double cream, ensuring that you have everything you need before starting the recipe.
- Melt the Chocolate:
- Break the dark chocolate into small pieces and place them in a heatproof bowl.
- Melt the chocolate using a double boiler or in the microwave in short bursts, stirring frequently until smooth and fully melted. Set aside to cool slightly.
- Whip the Double Cream:
- In a separate mixing bowl, pour in the double cream. Using an electric mixer or a whisk, whip the cream until stiff peaks form. Be careful not to overwhip the cream, as it can become grainy.
- Combine the Ingredients:
- Once the chocolate has cooled slightly, pour it into the whipped cream.
- Add the sweetened condensed milk to the mixture, gently folding everything together until well combined and smooth.
- Freeze the Ice Cream:
- Transfer the mixture into a freezer-safe container, smoothing it out into an even layer.
- Cover the container with a lid or plastic wrap to prevent ice crystals from forming on the surface of the ice cream.
- Place the container in the freezer and allow the ice cream to freeze for at least 6 hours or overnight, until firm.
- Serve and Enjoy:
- Once the ice cream is fully frozen, remove it from the freezer and let it sit at room temperature for a few minutes to soften slightly.
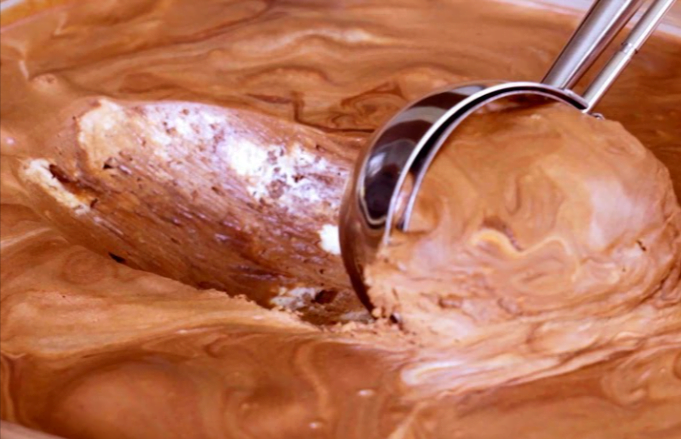
- Scoop the ice cream into bowls or cones and serve immediately, garnished with your favorite toppings such as chocolate shavings, chopped nuts, or fresh berries.
Cook’s Notes and Variations:
- Experiment with Flavors: Get creative with your homemade ice cream by experimenting with different flavor variations. Add ingredients such as crushed cookies, nuts, fruit purees, or extracts to customize the flavor to your liking.
- Texture Adjustment: For a smoother texture, strain the melted chocolate through a fine-mesh sieve before combining it with the whipped cream and condensed milk. This will remove any lumps and ensure a silky-smooth consistency.
- Dairy-Free Option: Substitute the double cream with coconut cream for a dairy-free alternative. Simply chill a can of full-fat coconut milk in the refrigerator overnight, then scoop out the thick cream that rises to the top and whip it until stiff peaks form.
Keto-Friendly and Low-Carb Versions:
Keto-Friendly Version:
- Use a keto-friendly sweetener such as powdered erythritol or stevia in place of sweetened condensed milk to reduce the carb content of the ice cream.
- Use unsweetened dark chocolate with a high cocoa content (at least 85%) to keep the sugar content low.
- Enjoy the ice cream in moderation as part of a keto-friendly meal plan.
Low-Carb Version:
- Replace the sweetened condensed milk with a low-carb alternative such as a sugar-free sweetened condensed milk or a combination of heavy cream and liquid sweetener.
- Choose dark chocolate with a higher cocoa content and minimal added sugars to reduce the carb content of the ice cream.
- Serve the ice cream with a side of fresh berries or whipped cream sweetened with a low-carb sweetener for a delicious low-carb dessert option.
FAQs:
Q: Can I use milk chocolate instead of dark chocolate? A: While dark chocolate is recommended for its rich flavor and lower sugar content, you can use milk chocolate if you prefer a sweeter taste. Just be aware that it will increase the overall sugar content of the ice cream.
Q: How long does the ice cream need to freeze before serving? A: The ice cream will need to freeze for at least 6 hours or overnight to fully set and develop its creamy texture. However, you can always check the consistency and firmness of the ice cream before serving and adjust the freezing time accordingly.
Q: Can I add mix-ins like nuts or chocolate chips to the ice cream? A: Absolutely! Feel free to add your favorite mix-ins such as chopped nuts, chocolate chips, or shredded coconut to the ice cream mixture before freezing. Just be sure to fold them in gently to distribute them evenly throughout the ice cream.
With just three simple ingredients and minimal effort, you can create a creamy and indulgent chocolate ice cream that’s sure to impress. Whether you’re following a keto diet, looking for a low-carb treat, or simply craving a delicious dessert, this homemade ice cream is a must-try. So grab your ingredients and get ready to enjoy a scoop of pure chocolatey goodness that’s guaranteed to satisfy your sweet cravings!