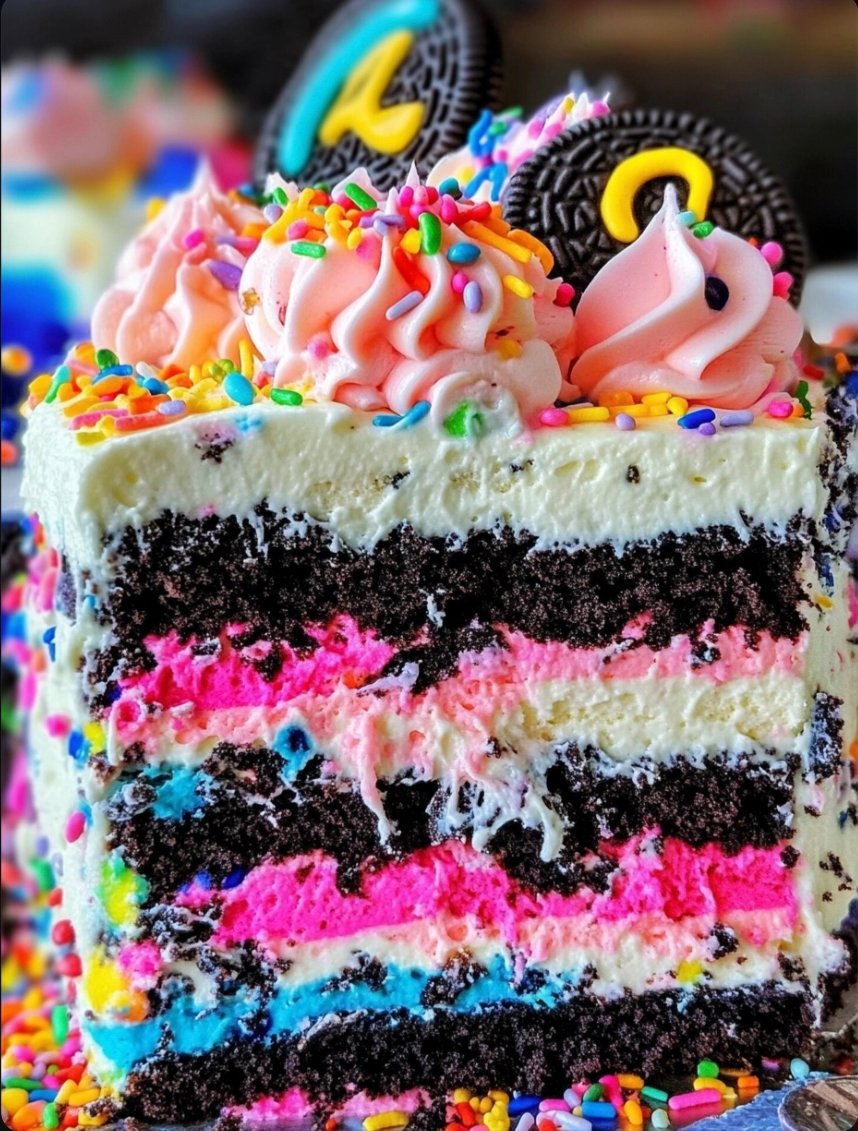
This No-Bake Funfetti Oreo Icebox Cake is the perfect blend of creamy, crunchy, and colorful! It’s made with layers of Funfetti cookies, Oreo cookies, and a delicious whipped cream filling. Not only is it fun to make, but it’s also incredibly easy since it requires no baking at all. This icebox cake is ideal for birthdays, parties, or any time you need a vibrant and tasty dessert that can be made in advance. Let’s dive into this delightful and fuss-free recipe!
Table of Contents
- Ingredients for Funfetti Oreo Icebox Cake
- Instructions for Funfetti Oreo Icebox Cake
- Tips & Notes
- Recipe Variations & Substitutions
- Frequently Asked Questions (FAQs)
- Conclusion
Ingredients for Funfetti Oreo Icebox Cake
- 1 package Funfetti cookies (about 24 cookies)
- 1 package Oreo cookies (about 24 cookies)
- 3 cups heavy whipping cream
- 1/4 cup powdered sugar
- 1 teaspoon vanilla extract
- 1/4 cup rainbow sprinkles
- 1/2 cup milk (for dipping cookies)
Instructions for Funfetti Oreo Icebox Cake
Step 1: Prepare the Whipped Cream
- In a large mixing bowl, beat the heavy whipping cream, powdered sugar, and vanilla extract together using an electric mixer until stiff peaks form. This will take about 3-4 minutes.
Step 2: Layer the Cookies and Whipped Cream
- In a 9×13-inch baking dish, spread a thin layer of whipped cream on the bottom.
- Quickly dip each Funfetti cookie in the milk, then place a single layer of dipped cookies on top of the whipped cream layer.
- Spread a layer of whipped cream over the Funfetti cookies, then add a layer of Oreo cookies, also dipped in milk.
- Continue layering the whipped cream, Funfetti cookies, and Oreo cookies, ending with a final layer of whipped cream.
Step 3: Add Sprinkles and Chill
- Sprinkle the rainbow sprinkles evenly over the top layer of whipped cream.
- Cover the dish with plastic wrap and refrigerate for at least 4-6 hours, or overnight for best results. This allows the cookies to soften and the flavors to meld together.
Step 4: Serve
- Once chilled, slice and serve the icebox cake. Enjoy the colorful layers and creamy texture!
Tips & Notes
- Milk Dipping Tip: Dip the cookies in milk quickly to prevent them from becoming too soggy. A quick dunk is all you need.
- Whipped Cream Consistency: Make sure the whipped cream reaches stiff peaks to help the cake hold its shape.
- Chill Time: For the best texture, refrigerate the icebox cake for at least 6 hours or even overnight. This helps the cookies soften and makes slicing easier.
Recipe Variations & Substitutions
- Chocolate Lovers: Add a layer of chocolate ganache between the cookie layers for extra indulgence.
- Different Cookies: Use chocolate chip cookies or vanilla wafers in place of the Funfetti or Oreo cookies for a different twist.
- Fruit Topping: Add fresh strawberries or raspberries between the layers for a fruity contrast to the sweetness of the cookies and cream.
Frequently Asked Questions (FAQs)
1. How do I store Funfetti Oreo Icebox Cake?
Store the icebox cake in the refrigerator, covered, for up to 3 days. This dessert actually gets better as it sits, allowing the flavors to meld together.
2. Can I use store-bought whipped topping instead of making my own?
Yes, you can use store-bought whipped topping like Cool Whip if you prefer. Just substitute it in equal amounts for the homemade whipped cream.
3. Can I make this icebox cake in advance?
Absolutely! This cake is perfect for making in advance since it needs time to chill. Prepare it 1 day ahead of time for the best flavor and texture.
4. Can I freeze the icebox cake?
While you can freeze the cake, the texture of the whipped cream and cookies may change slightly. If you choose to freeze it, let it thaw in the refrigerator for a few hours before serving.
This No-Bake Funfetti Oreo Icebox Cake is a colorful and creamy treat that’s perfect for any occasion. It’s easy to make, fun to eat, and a guaranteed crowd-pleaser with its layers of cookies, cream, and vibrant sprinkles. Whether it’s a birthday party or a casual get-together, this icebox cake will impress your guests with minimal effort. Give this simple recipe a try, and enjoy every bite of this delightful no-bake creation!
Happy no-baking, and enjoy this festive, sweet treat!


