Scones are a classic baked good that pairs perfectly with a cup of tea or coffee. Whether you’re enjoying them for breakfast, brunch, or an afternoon snack, these scones are quick and easy to make, yet they taste like you’ve spent hours in the kitchen. Let’s dive into the step-by-step process to make these delicious scones that are sure to impress.
Ingredients Overview:
Dry Ingredients:
- 3 cups flour: The base of the scones, providing structure and a light texture.
- ⅓ cup sugar: Adds sweetness and helps with the browning of the scones.
- 1 teaspoon salt: Enhances the flavor of the scones and balances the sweetness.
- 1/2 tablespoon baking powder: Provides the leavening, giving the scones their rise and fluffiness.
- ½ teaspoon baking soda: Works with the buttermilk to create a tender crumb.
Wet Ingredients:
- ¾ cup butter, chilled and cubed: The butter should be cold and cut into cubes to create flaky layers in the scones.
- 1 cup buttermilk: The acidity of the buttermilk helps to tenderize the scones and react with the baking soda for lift.
- 1 egg: Adds richness and helps bind the ingredients together.
- 2 teaspoons vanilla: Provides a warm, sweet flavor that complements the buttery scones.
For the Topping:
- 1 egg white, beaten: Helps to give the scones a shiny, golden top.
- 2 tablespoons turbinado sugar: Adds a delightful crunch and sweetness to the top of the scones.
Step-by-Step Instructions:
Step 1: Preheat and Prepare
- Preheat your oven: Set your oven to 400°F (200°C) and line a baking sheet with parchment paper or a silicone baking mat. This will prevent the scones from sticking and ensure even baking.
Step 2: Mix the Dry Ingredients
- Combine the dry ingredients: In a large mixing bowl, whisk together the flour, sugar, salt, baking powder, and baking soda. This ensures that the leavening agents are evenly distributed throughout the flour.
Step 3: Cut in the Butter
- Add the butter: Add the chilled, cubed butter to the flour mixture. Using a pastry cutter, two knives, or your fingertips, cut the butter into the flour until the mixture resembles coarse crumbs. The small pieces of butter create pockets of steam as they melt during baking, resulting in flaky scones.
Step 4: Combine the Wet Ingredients
- Mix the wet ingredients: In a separate bowl, whisk together the buttermilk, egg, and vanilla until well combined.
- Form the dough: Make a well in the center of the dry ingredients and pour in the wet mixture. Gently mix with a fork or spatula until just combined. The dough should be slightly sticky but manageable. Be careful not to overmix, as this can result in tough scones.
Step 5: Shape the Scones
- Turn out the dough: Lightly flour a clean surface and turn out the dough. Gently knead it a few times to bring it together. If the dough is too sticky, add a bit more flour.
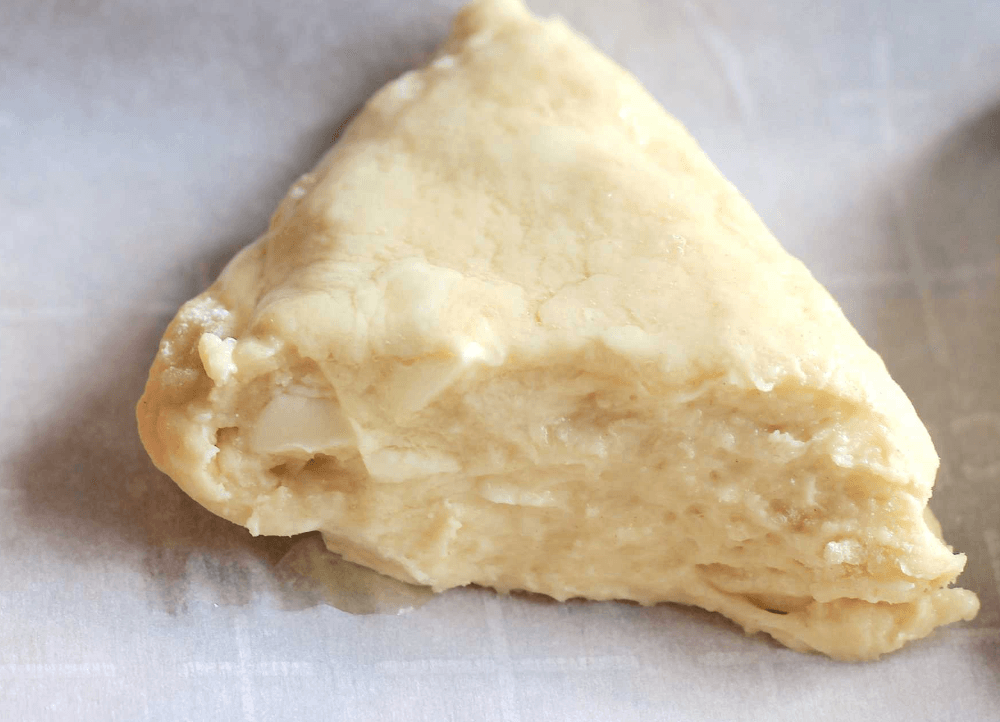
- Shape and cut the scones: Pat the dough into a circle or rectangle about 1-inch thick. Use a knife or a pastry cutter to cut the dough into wedges, squares, or rounds, depending on your preference. Transfer the scones to the prepared baking sheet, spacing them slightly apart.
Step 6: Add the Finishing Touches
- Brush with egg white: Lightly brush the tops of the scones with the beaten egg white. This step gives the scones a beautiful golden color when baked.
- Sprinkle with turbinado sugar: Sprinkle the tops with turbinado sugar for a sweet, crunchy finish.
Step 7: Bake the Scones
- Bake: Place the baking sheet in the preheated oven and bake for 15-18 minutes, or until the scones are golden brown and a toothpick inserted into the center comes out clean.
- Cool: Remove the scones from the oven and let them cool on the baking sheet for a few minutes before transferring them to a wire rack to cool completely.
Step 8: Serve and Enjoy
- Serve warm or at room temperature: These scones are best enjoyed fresh from the oven, but they can also be stored in an airtight container for up to two days. Serve them plain or with your favorite spreads, such as butter, clotted cream, jam, or honey.
- Perfect Pairings: Scones are incredibly versatile and pair well with a variety of beverages, from a hot cup of tea or coffee to a glass of milk. For a special treat, enjoy them with a homemade fruit preserve or a dollop of whipped cream.
Tips and Variations:
- Add-ins: Customize your scones by folding in dried fruits like cranberries or raisins, nuts, chocolate chips, or citrus zest into the dough before shaping.
- Flavor Variations: For a different flavor profile, try substituting the vanilla extract with almond extract or adding spices like cinnamon or nutmeg to the dry ingredients.
- Gluten-Free Option: Substitute the all-purpose flour with a gluten-free flour blend for a gluten-free version of these scones. Make sure the baking powder and baking soda you use are also gluten-free.
These Quick & Easy Scones are a delightful treat that can be whipped up in no time. With a tender, buttery crumb and a slightly crunchy top, they are sure to become a family favorite. Whether you enjoy them for breakfast, brunch, or an afternoon snack, these scones are versatile and can be customized to suit your tastes. With this easy-to-follow recipe, you’ll have a batch of delicious scones ready to enjoy in less than an hour


