Introduction
Imagine a hot summer day, and the craving for a cold, creamy treat kicks in. That’s where delicious no-churn ice cream comes to the rescue! This homemade delight is not only easy to make but also incredibly satisfying. In this article, we’ll dive into the world of no-churn ice cream, exploring its simplicity, versatility, and the joy it brings to both the maker and the eater.
One of the unique aspects of no-churn ice cream is that you don’t need an ice cream maker to whip up this frozen dessert. With just a few basic ingredients and a little bit of patience, you can create a decadent treat that rivals any store-bought pint. The beauty of no-churn ice cream lies in its simplicity and the endless flavor possibilities it offers.
While traditional churned ice cream has its place in history, no-churn ice cream brings a modern twist to the dessert world. It’s perfect for those spontaneous cravings or last-minute gatherings when you want to impress your guests with a homemade sweet treat. The best part? You can customize the flavors to suit your preferences and dietary needs.
Get ready to embark on a delightful journey of creating your own no-churn ice cream flavors, from classic vanilla to indulgent chocolate swirls and fruity concoctions. The possibilities are endless, and the satisfaction of enjoying a scoop of your homemade creation is truly unbeatable.
Why You’ll Love This Recipe
What sets no-churn ice cream apart is its simplicity and convenience. Unlike traditional ice cream recipes that require an ice cream maker and a lengthy churning process, this no-churn version is quick and easy to prepare. With just a few key ingredients, you can whip up a creamy and luscious dessert in no time.
Another reason to love this recipe is its versatility. You can experiment with various flavors, mix-ins, and toppings to create a personalized ice cream experience. Whether you prefer a classic flavor profile or want to explore bold combinations, no-churn ice cream allows you to unleash your creativity in the kitchen.
Additionally, this recipe is perfect for those with dietary restrictions or preferences. You can easily adapt the ingredients to accommodate vegan, gluten-free, or dairy-free diets, making it a dessert that everyone can enjoy. The creamy texture and rich taste of no-churn ice cream will have you coming back for more, time and time again.
So, if you’re looking for a hassle-free dessert that delivers on flavor and texture, this no-churn ice cream recipe is sure to become a staple in your kitchen. Whether you’re a novice cook or a seasoned pro, creating your own batch of homemade ice cream has never been more accessible and rewarding.
Ingredients
Here are the key ingredients you’ll need to make a basic batch of no-churn ice cream:
– Heavy cream
– Sweetened condensed milk
– Vanilla extract
Optional Ingredient Substitutions:
– For a dairy-free version, you can use coconut cream instead of heavy cream.
– Experiment with different flavor extracts like almond, mint, or coffee for unique variations.
Feel free to customize the mix-ins and toppings based on your preferences. From crushed cookies to fresh fruit and nuts, the choice is yours to create a personalized ice cream masterpiece.
Step-by-Step Instructions
1. In a large mixing bowl, whip the heavy cream until stiff peaks form.
2. Gently fold in the sweetened condensed milk and vanilla extract until well combined.
3. Pour the mixture into a loaf pan or airtight container, smoothing the top with a spatula.
4. Add any desired mix-ins by swirling them into the ice cream base.
5. Cover the container with plastic wrap and freeze for at least 6 hours or overnight until the ice cream is set.
6. Once frozen, scoop out the creamy goodness and serve in bowls or cones, garnishing with your favorite toppings.
Pro Tip: For a softer texture, let the ice cream sit at room temperature for a few minutes before scooping.
Expert Tips for Success
– Ensure that the heavy cream is well chilled before whipping to achieve the best volume and texture.
– Avoid overmixing the cream and condensed milk to maintain a light and airy consistency in the ice cream.
– Experiment with different flavor combinations and mix-ins to create unique ice cream flavors that suit your taste preferences.
– For a fun twist, try layering different flavored ice creams in the container before freezing to create a marbled effect when scooped.
Variations and Substitutions
Looking to switch up your no-churn ice cream game? Here are some creative variations and ingredient substitutions to try:
– Replace the vanilla extract with other extracts like almond, peppermint, or coconut for a flavor boost.
– Swirl in chocolate chips, cookie crumbs, or caramel sauce for added indulgence and texture.
– For a healthier option, blend frozen bananas with the sweetened condensed milk for a creamy and naturally sweetened base.
– Experiment with different types of milk alternatives like almond milk or oat milk for a dairy-free and lighter version of no-churn ice cream.
Serving Suggestions
To elevate your no-churn ice cream experience, consider these serving suggestions:
– Top your scoops with a drizzle of hot fudge sauce, whipped cream, and a cherry for a classic sundae treat.
– Pair your ice cream with freshly baked cookies or brownies for a delightful ice cream sandwich experience.
– Create a DIY ice cream bar with an array of toppings like sprinkles, nuts, fruits, and syrups for a fun and interactive dessert spread.
– Blend your no-churn ice cream with milk to make a creamy milkshake or freeze it between two cookies for a homemade ice cream sandwich.
FAQs
Q: Can I use a hand mixer instead of a stand mixer to whip the cream?
A: Yes, a hand mixer can be used to whip the cream until stiff peaks form. Just ensure that the beaters and bowl are chilled for best results.
Q: How long can I store homemade no-churn ice cream in the freezer?
A: Homemade ice cream can be stored in the freezer for up to 2 weeks. Be sure to cover it tightly to prevent ice crystals from forming.
Q: Can I reduce the amount of sweetened condensed milk for a less sweet ice cream?
A: Yes, you can adjust the amount of sweetened condensed milk to suit your taste preferences. Start with a smaller amount and add more as needed.
Final Thoughts
In conclusion, no-churn ice cream offers a delightful and accessible way to enjoy a homemade frozen treat with endless flavor possibilities. Whether you’re a fan of classic vanilla or adventurous with your flavor combinations, this recipe is sure to satisfy your sweet cravings and impress your taste buds.
So, gather your ingredients, follow the simple steps, and let your creativity shine as you whip up your own batch of creamy no-churn ice cream. Whether enjoyed solo on a lazy afternoon or shared with loved ones at a summer gathering, this homemade dessert is bound to become a favorite in your recipe collection.
Try out different variations, experiment with flavors, and have fun creating your personalized no-churn ice cream masterpieces. Share your experiences with us and spread the joy of homemade treats with those around you. Get ready to indulge in the creamy goodness of no-churn ice cream and savor every scoop!
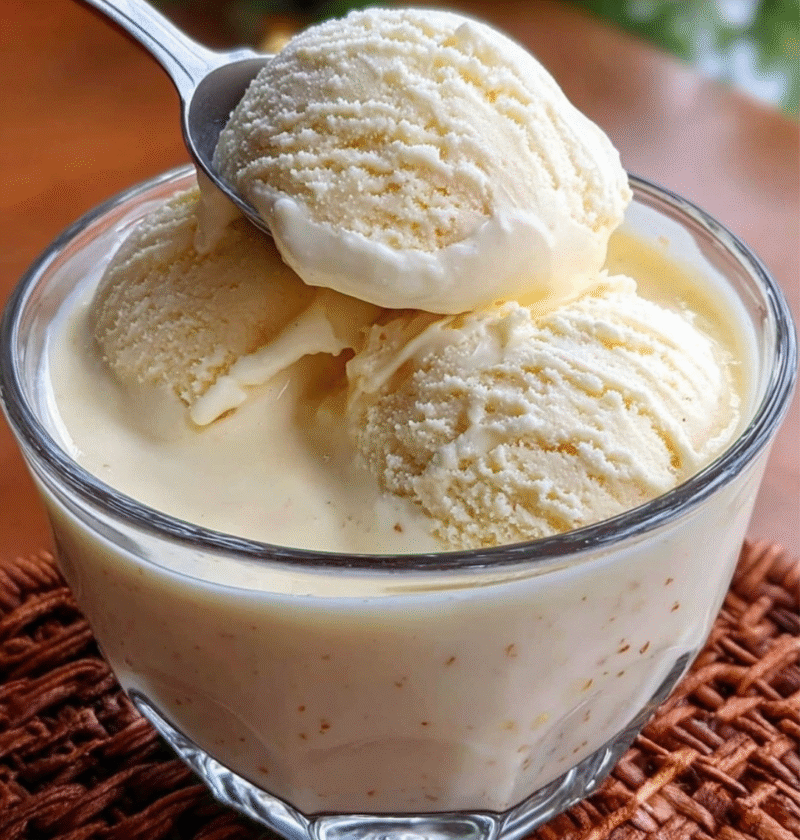
Delicious No-Churn Ice Cream
Indulge in a creamy, homemade frozen delight with this simple and versatile no-churn ice cream recipe. Explore endless flavor possibilities and enjoy the convenience of creating your own personalized frozen treat without the need for an ice cream maker.
Ingredients
- 2 cups heavy cream
- 1 can sweetened condensed milk
- 1 teaspoon vanilla extract
Directions
- In a large mixing bowl, whip the heavy cream until stiff peaks form.
- Gently fold in the sweetened condensed milk and vanilla extract until well combined.
- Pour the mixture into a loaf pan or airtight container, smoothing the top with a spatula.
- Add any desired mix-ins by swirling them into the ice cream base.
- Cover the container with plastic wrap and freeze for at least 6 hours or overnight until the ice cream is set.
- Once frozen, scoop out the creamy goodness and serve in bowls or cones, garnishing with your favorite toppings.
- Pro Tip: For a softer texture, let the ice cream sit at room temperature for a few minutes before scooping.