When it comes to desserts that are quick, simple, and utterly delicious, the 4-Ingredient Baked Marshmallow Fluff Dessert truly stands out as a favorite for many. This dessert is not only nostalgic, reminding many of childhood campfire treats, but it also requires only four ingredients that you probably already have in your pantry. For those who may not know, marshmallow fluff is a sweet, creamy spread made from sugar, corn syrup, and egg whites, and it lends a delightful texture to this dish. The creamy, fluffy marshmallow fluff melds beautifully with the other ingredients, creating an indulgent treat that is perfect for parties, family gatherings, or a cozy family night. The layers of flavor and texture in this dessert are sure to impress any crowd, from kiddos to adults. The sweet richness of the marshmallow combined with the crunchy graham cracker and the melt-in-your-mouth chocolate creates a delightful experience for your taste buds. The best part? It can be made in under an hour, making it a go-to recipe for anyone in a hurry to satisfy their sweet tooth! With its minimal prep and bake time, you can whip this treat up even on a busy weeknight.
Ingredients
To create this delightful dessert, you will need the following ingredients: You can learn more about this topic.
- 1 cup marshmallow fluff – For that sweet, gooey center, choose a high-quality brand for the best flavor and texture. Look for fluff that is smooth and spreadable, enhancing the dessert’s overall enjoyment. The fluff should have a glossy appearance, indicating freshness, and it should be easy to scoop out of the container.
- 1 cup crushed graham crackers – These provide a crunchy texture and a hint of flavor reminiscent of s’mores. Aim for a fine crumb for easier mixing and better adherence to the base. You can crush them yourself using a food processor or place them in a zip-tight bag and crush them with a rolling pin. The finer the crumbs, the more cohesive your crust will be, leading to a better overall structure in the finished dessert.
- 1 cup chocolate chips – Choose semi-sweet or milk chocolate for a rich and satisfying flavor that pairs perfectly with the marshmallow. Dark chocolate can also add a sophisticated twist. Consider using mini chocolate chips for more even distribution throughout the dessert, or feel free to mix different types of chocolate chips for a more complex flavor profile. This layering of flavors can create delightful surprises in each bite.
- 1/2 cup unsalted butter, melted – This helps bind the ingredients together and adds richness. Using unsalted butter allows you to control the saltiness of the dessert and enhances the sweetness of the marshmallow fluff. Ensure the butter is completely melted and slightly cooled before mixing to avoid cooking the marshmallow fluff when combined.
Note: For a gluten-free version, use gluten-free graham crackers. You can also substitute the chocolate chips with white chocolate or even peanut butter chips for a unique twist that adds a different flavor profile. If you’re feeling adventurous, consider adding a layer of crushed nuts like pecans or walnuts for extra crunch. These nuts not only contribute a delightful texture but also a nutty flavor that complements the sweetness of the dessert. Check out our related guide for more tips on ingredient alternatives and enhancements that can elevate this dessert!
Steps / Instructions
- Preheat your oven: Set your oven to 350°F (175°C) to ensure it’s hot and ready for baking. Preheating is crucial as it helps the dessert bake evenly and achieve that perfect golden top. This temperature is ideal for allowing the marshmallow fluff to bubble and the chocolate to melt harmoniously, creating a beautifully textured dessert from the bottom up.
- Prepare the baking dish: Grease an 8×8 inch baking dish with a little butter or cooking spray to prevent sticking. You can also line the dish with parchment paper for easier removal once baked. This way, you ensure that your dessert can be lifted out easily for cutting into neat squares. The parchment paper also helps to create clean edges, enhancing the presentation if you’re serving guests.
- Mix the dry ingredients: In a large mixing bowl, combine the crushed graham crackers and melted butter. Stir until the graham cracker crumbs are fully coated with butter. This mixture should be moist but still crumbly, resembling wet sand. Take care to ensure every crumb is coated, as this will help create a cohesive crust. If it feels too dry, you can add a little more melted butter, but be mindful not to make it too greasy.
- Form the base: Press the graham cracker mixture evenly into the bottom of the prepared baking dish. Use the back of a measuring cup to create a compact, even layer. Make sure it is packed tightly to form a sturdy base that holds up when cut. A well-formed base is essential for keeping the dessert intact and ensuring a pleasing presentation. Allow it to rise slightly along the edges for a more rustic look.
- Add the chocolate chips: Sprinkle half of the chocolate chips over the graham cracker base, allowing them to melt slightly during baking. This will create pockets of gooey chocolate flavor that enhance the overall taste. Feel free to distribute them evenly or concentrate them in certain areas for dramatic melty spots. Consider pressing the chocolate chips lightly into the graham cracker base for enhanced adhesion.
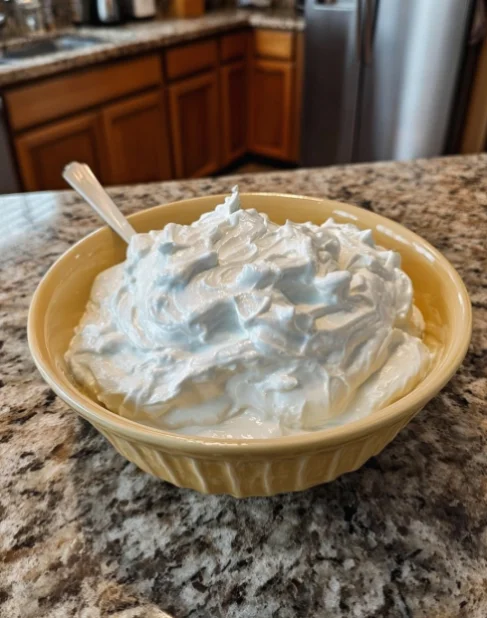
- Spread the marshmallow fluff: Gently dollop the marshmallow fluff over the chocolate chip layer, spreading it evenly with a spatula. Try to cover the chocolate chips completely for an even distribution of flavors. Be careful not to deflate the fluff too much; the goal is to maintain that airy texture as you spread. A spatula dipped in warm water can help in smoothing it out without sticking.
- Top with the remaining chocolate chips: Sprinkle the remaining chocolate chips on top of the marshmallow fluff, ensuring a rich chocolate flavor throughout. This will also create a lovely melty layer on top once baked. Adding chips before baking allows them to meld beautifully with the fluff and graham cracker base, creating a delightful layer of chocolate that perfectly complements the other textures.
- Bake: Place the dish in the preheated oven and bake for 20-25 minutes, or until the top is bubbly and slightly golden. Keep an eye on it to prevent burning; the edges should be nicely set while the center remains fluffy. You’ll know it’s done when the marshmallow fluff puffs up and develops a light golden hue that invites you to dig in. The aroma will fill your kitchen, promising a delightful treat.
- Cool and serve: Allow the dessert to cool for at least 10 minutes before cutting into squares. This will help set the layers and make serving easier. If you wait a bit longer, it will firm up, making it easier to cut clean squares. Serve warm for the best experience, as the chocolate will still be gooey and the marshmallow fluff will be perfectly soft, creating a heavenly combination of textures.
Tips & Tricks
Here are some handy tips to ensure your 4-Ingredient Baked Marshmallow Fluff Dessert turns out perfectly:
- Storage: Keep any leftovers covered in the fridge. It will last for about 3 to 4 days, although the texture is best enjoyed fresh. You can also freeze individual squares for a quick dessert later. Just wrap them tightly in plastic wrap and place them in an airtight container. For best results, thaw in the refrigerator before serving to retain the right texture.
- Make-ahead option: You can prepare the base and layer the marshmallow fluff in advance, then bake it just before serving. This allows you to enjoy the dessert warm and fresh from the oven, enhancing the flavors. Preparing it in advance is also a great strategy for parties or gatherings, giving you more time to enjoy with your guests.
- Common mistakes to avoid: Ensure that the graham cracker base is firmly pressed to avoid crumbling when served. Also, try to spread the fluff gently to maintain its airy texture, as aggressive mixing can deflate it. Additionally, keep an eye on baking times, as ovens can vary, and you want to prevent over-baking, which can lead to a tougher texture.
- Pro tip: For an added touch of flavor, consider drizzling some melted chocolate over the top after baking or adding a sprinkle of sea salt before serving. This contrast of flavors can elevate your dessert from good to extraordinary. You can also garnish with mini marshmallows or a dollop of whipped cream for an extra indulgent touch. These finishing touches not only enhance the flavor but also add visual appeal.
4-Ingredient Baked Marshmallow Fluff Dessert
A quick and simple dessert that combines marshmallow fluff, crushed graham crackers, chocolate chips, and melted butter for a delightful treat.
Ingredients
- 1 cup marshmallow fluff
- 1 cup crushed graham crackers
- 1 cup chocolate chips
- 1/2 cup unsalted butter, melted
Directions
Preheat your oven to 350°F (175°C).
Grease an 8x8 inch baking dish with butter or cooking spray.
In a large mixing bowl, combine the crushed graham crackers and melted butter. Stir until fully coated.
Press the graham cracker mixture evenly into the bottom of the prepared baking dish.
Sprinkle half of the chocolate chips over the graham cracker base.
Dollop the marshmallow fluff over the chocolate chip layer, spreading it evenly.
Sprinkle the remaining chocolate chips on top of the marshmallow fluff.
Bake for 20-25 minutes, or until the top is bubbly and slightly golden.
Allow the dessert to cool for at least 10 minutes before cutting into squares.
Recipe Reviews
- ★★★★★
Excellent recipe!
Leave a Reply
Your email address will not be published. Required fields are marked *