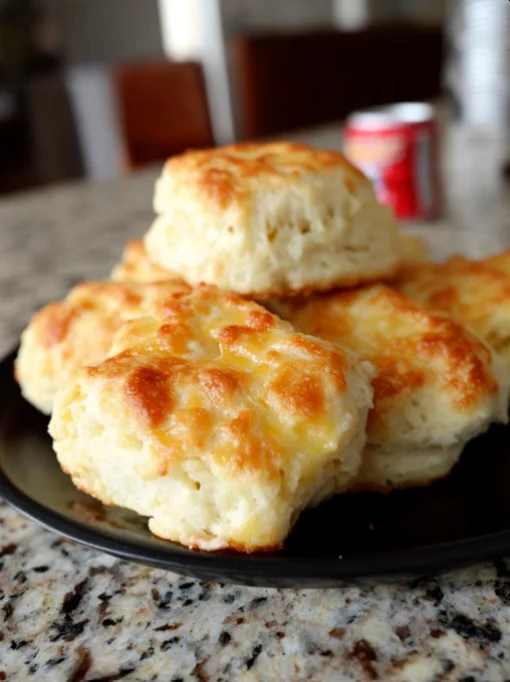
Cathead Biscuits are a beloved staple of Southern cuisine, known for their large size and soft, flaky texture. The name is derived from their size, which is akin to a cat’s head—a fitting description for these hearty biscuits. Originating in the kitchens of the American South, these biscuits have become synonymous with comfort food, making appearances at breakfast tables and family gatherings across the region. What makes this homemade cathead biscuit recipe special is its simplicity and the use of self-rising flour, which eliminates the need for baking powder and baking soda, streamlining the process while still delivering that classic buttery biscuit texture. Whether served with gravy, jam, or simply butter, these biscuits are sure to warm your heart. In many Southern households, preparing cathead biscuits is a cherished ritual passed down through generations, often enjoyed alongside rich stews or as a dedicated breakfast treat, embodying the essence of Southern hospitality and home-cooked goodness. These biscuits not only satisfy hunger but also evoke memories of family gatherings and shared meals, making them a timeless recipe worth mastering. The unique combination of flavors and textures in cathead biscuits truly captures the spirit of Southern cooking, proving that sometimes the simplest recipes can hold the most significance and bring people together.
Ingredients
Gather the following ingredients to make delicious Cathead Biscuits:
- Dry Ingredients:
- 4 cups self-rising flour
- 1 teaspoon salt
- Wet Ingredients:
- 1 cup buttermilk, warmed to around 110°F (43°C) for optimal incorporation. The warmth helps with the activation of flavors and ensures a better consistency in the final product.
- 1 cup unsalted butter, melted and slightly cooled to prevent cooking the flour, which could lead to a dense biscuit texture. Using unsalted butter allows you to control the saltiness of your biscuits, enhancing the overall flavor experience.
- Toppings (optional):
- Butter, for spreading and adding richness. Try using herb-infused butter for an extra layer of flavor, such as adding fresh garlic or rosemary to the melted butter.
- Honey or jam, for serving, with options like strawberry, peach, or fig. These sweet toppings contrast beautifully with the buttery flavor of the biscuits and can add a delightful sweetness to your breakfast.
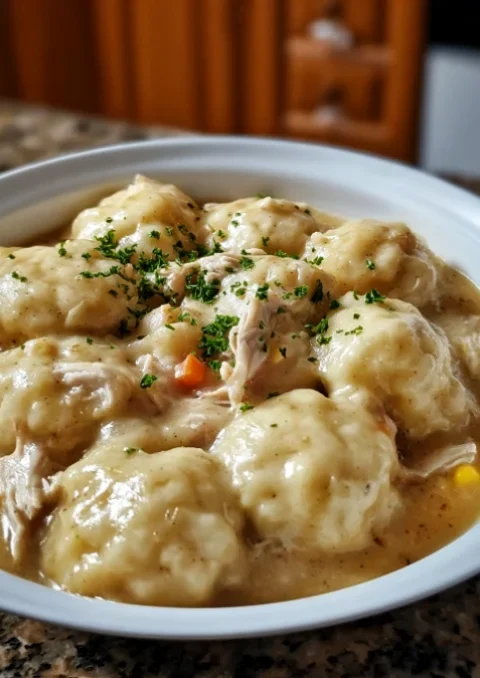
- Gravy, for biscuits and gravy, preferably a creamy sausage gravy for a hearty meal. The combination of flavors is a hallmark of Southern breakfasts and can turn a simple biscuit into a filling meal.
Using high-quality ingredients, particularly fresh buttermilk and real butter, will enhance the flavor and texture of your biscuits. If you don’t have buttermilk, you can substitute it with a mixture of milk and vinegar or lemon juice (1 tablespoon of vinegar or lemon juice per cup of milk; let it sit for 5-10 minutes). This homemade substitute mimics the tangy profile of buttermilk, which is crucial for that authentic flavor in your Cathead Biscuits. Check out our related guide for more tips on ingredient selection and alternatives that may suit your dietary needs. Remember, the quality of your ingredients can make a significant difference in the final result, so choose wisely. Fresh ingredients not only elevate the dish but also offer a more vibrant taste that enhances the overall dining experience.
Steps / Instructions
- Preheat Your Oven: Preheat your oven to 450°F (232°C). This high temperature is crucial for achieving the flaky biscuit dough that rises beautifully, ensuring a crispy exterior while remaining soft inside. A properly preheated oven will help set the structure of the biscuits quickly, allowing them to rise uniformly and achieve that characteristic texture.
- Prepare Dry Ingredients: In a large mixing bowl, combine the self-rising flour and salt. Whisk them together until they are well mixed, ensuring there are no lumps. This step is essential as it helps distribute the salt evenly throughout the flour, enhancing the overall flavor of the biscuits. A fine, lump-free mixture will ensure that the leavening agents work effectively, contributing to the biscuits’ light and airy quality.
- Add Wet Ingredients: Make a well in the center of the flour mixture and pour in the warmed buttermilk and melted butter. Stir gently with a fork until just combined, being careful not to overmix, as this can lead to tough biscuits. The mixture should appear slightly shaggy; this is a good indication that you’re on the right track. The goal is to hydrate the flour without developing the gluten too much, which is critical for maintaining that light, tender texture that cathead biscuits are known for.
- Form the Dough: Turn the dough out onto a floured surface. Using floured hands, gently knead the dough just enough to bring it together. You want to maintain that light, flaky texture, so the goal is to handle it as little as possible. Aim for just 5-6 turns to incorporate everything without overworking. The dough should feel soft and slightly tacky, but not overly sticky, allowing for easy handling and shaping.
- Shape the Biscuits: Pat the dough into a 1-inch thick rectangle. Using a sharp knife or a biscuit cutter (if you prefer round biscuits), cut the dough into large squares or rounds. Remember, cathead biscuits are typically larger than traditional biscuits, so aim for about 3 inches in diameter or cut them into generous squares, ensuring even thickness for uniform baking. The larger size contributes to the delightful soft interior that is characteristic of a perfect cathead biscuit.
- Place on Baking Sheet: Arrange the cut biscuits on a baking sheet lined with parchment paper. Make sure they are close together, as this will help them rise taller and stay moist. Crowding them slightly promotes a soft side texture, which is characteristic of cathead biscuits. The biscuits should touch slightly to encourage soft side crusts, creating a delightful texture with each bite.
- Bake: Bake in the preheated oven for 12-15 minutes, or until the tops are golden brown. You’ll know they’re done when they are puffed and lightly browned on top. The aroma will fill your kitchen, a sure sign that delightful biscuits are on the way! You can check for doneness by gently tapping the top; it should sound hollow if they are cooked through and ready to be enjoyed.
- Cool and Serve: Remove the biscuits from the oven and let them cool slightly before serving. Brush the tops with additional melted butter for extra richness, giving them a beautiful sheen and enhancing their buttery flavor. This final touch will make your cathead biscuits even more irresistible, ensuring they shine on the table as a centerpiece of your meal.
Tips & Tricks
To achieve the best results, keep these tips in mind:
- Keep Ingredients Cold: For an even flakier texture, use cold butter and buttermilk. This helps create steam in the oven, resulting in a light and airy biscuit. Chilling the butter can even further enhance the flakiness. You can even place the flour in the refrigerator for a short time before mixing to ensure all components are cool.
- Don’t Overwork the Dough: Mix until just combined to avoid tough biscuits. The key to a flaky biscuit dough is minimal handling, so resist the urge to knead excessively. The less you handle the dough, the more tender the final product will be. This is a crucial step in ensuring your cathead biscuits maintain their classic texture.
- Storage: Store leftover biscuits in an airtight container at room temperature for up to 2 days. For longer storage, wrap them tightly and freeze for up to 3 months. Reheat in the oven for a few minutes to regain their freshness and crispness, as microwaving can make them chewy. A light oven reheat will help maintain their original texture and keep them enjoyable.
- Make Ahead: You can prepare the dough in advance, cut the biscuits, and freeze them uncooked. When you’re ready to bake, simply place them in the oven from frozen, adding a few extra minutes to the baking time, allowing you to enjoy fresh biscuits at a moment’s notice. This is a great time-saver for busy mornings or last-minute gatherings.
- Common Mistakes: Avoid using all-purpose flour instead of self-rising flour unless you adjust for baking powder and salt. Also, ensure that your oven is fully preheated for even baking; a cold oven can result in flat, undercooked biscuits. Using a thermometer to check your oven’s temperature can help ensure accuracy and improve your baking results.
Variations
While this recipe creates classic Cathead Biscuits, you can customize them to suit your taste:
- Savory Additions: Consider incorporating shredded cheese, chopped herbs, or cooked bacon into the dough for added flavor. Cheddar cheese is a popular choice, adding a delightful sharpness that complements the buttery biscuit. Fresh chives or rosemary can elevate the taste even further, creating an aromatic experience with each bite.
- Sweet Variations: For a sweeter biscuit, add a few tablespoons of sugar, or mix in mashed bananas or blueberries for a delightful twist. These sweet additions pair well with a drizzle of honey or a spread of cream cheese, creating a unique breakfast item that satisfies both sweet and savory cravings.
- Healthier Options: Substitute half of the flour with whole wheat flour for a heartier biscuit or use Greek yogurt in place of buttermilk for a protein boost. These adjustments can help cater to specific dietary preferences while still delivering on taste and texture. You might also consider adding ground flaxseeds or chia seeds for an additional health benefit, making your cathead biscuits even more nutritious.
Serving Suggestions
Cathead Biscuits are versatile and can be served in numerous ways. Pair them with:
- Southern Gravy: Pour warm sausage gravy over the biscuits for a traditional breakfast experience, creating a satisfying, hearty meal that is beloved in Southern households. The creamy gravy blends beautifully with the fluffy texture of the biscuits, making each bite comforting and indulgent.
- Sweet Spreads: Serve with butter, honey, or your favorite jam for a comforting treat that balances the savory elements of the biscuit. Try flavored butters, like cinnamon or citrus, for an exciting twist that can elevate your breakfast experience to new heights.
- Accompanying Dishes: These biscuits complement a range of Southern comfort foods, such as Okra and Green Tomato Fritters or Southern Fried Potatoes, making them a perfect addition to any meal. They also pair beautifully with fried chicken, collard greens, or a simple garden salad, rounding out a complete Southern feast. The versatility of cathead biscuits allows them to shine at any meal, whether breakfast, lunch, or dinner.
Try this Cathead Biscuit recipe at home and experience the delightful texture and flavor of a true Southern comfort food. Perfect for breakfast, brunch, or as a side to your favorite Southern dishes, these biscuits will surely become a cherished part of your family traditions. Each bite is a reminder of home, warmth, and the rich culinary heritage of the South. Don’t forget to share your experiences and variations as you explore this classic recipe! Embrace the joy of cooking and the heartwarming flavors that come from making cathead biscuits, and watch as they bring friends and family together around the table.
Cathead Biscuits
Cathead Biscuits are a beloved staple of Southern cuisine, known for their large size and soft, flaky texture. These biscuits have become synonymous with comfort food, making appearances at breakfast tables and family gatherings across the region.
Ingredients
- 4 cups self-rising flour
- 1 teaspoon salt
- 1 cup buttermilk, warmed to around 110°F (43°C)
- 1 cup unsalted butter, melted and slightly cooled
Directions
Preheat your oven to 450°F (232°C).
In a large mixing bowl, combine the self-rising flour and salt. Whisk them together until they are well mixed.
Make a well in the center of the flour mixture and pour in the warmed buttermilk and melted butter. Stir gently with a fork until just combined.
Turn the dough out onto a floured surface. Using floured hands, gently knead the dough just enough to bring it together.
Pat the dough into a 1-inch thick rectangle. Cut the dough into large squares or rounds.
Arrange the cut biscuits on a baking sheet lined with parchment paper, making sure they are close together.
Bake in the preheated oven for 12-15 minutes, or until the tops are golden brown.
Remove the biscuits from the oven and let them cool slightly before serving. Brush the tops with additional melted butter.
Nutrition Facts
Recipe Reviews
- ★★★★★
Excellent recipe!
Leave a Reply
Your email address will not be published. Required fields are marked *