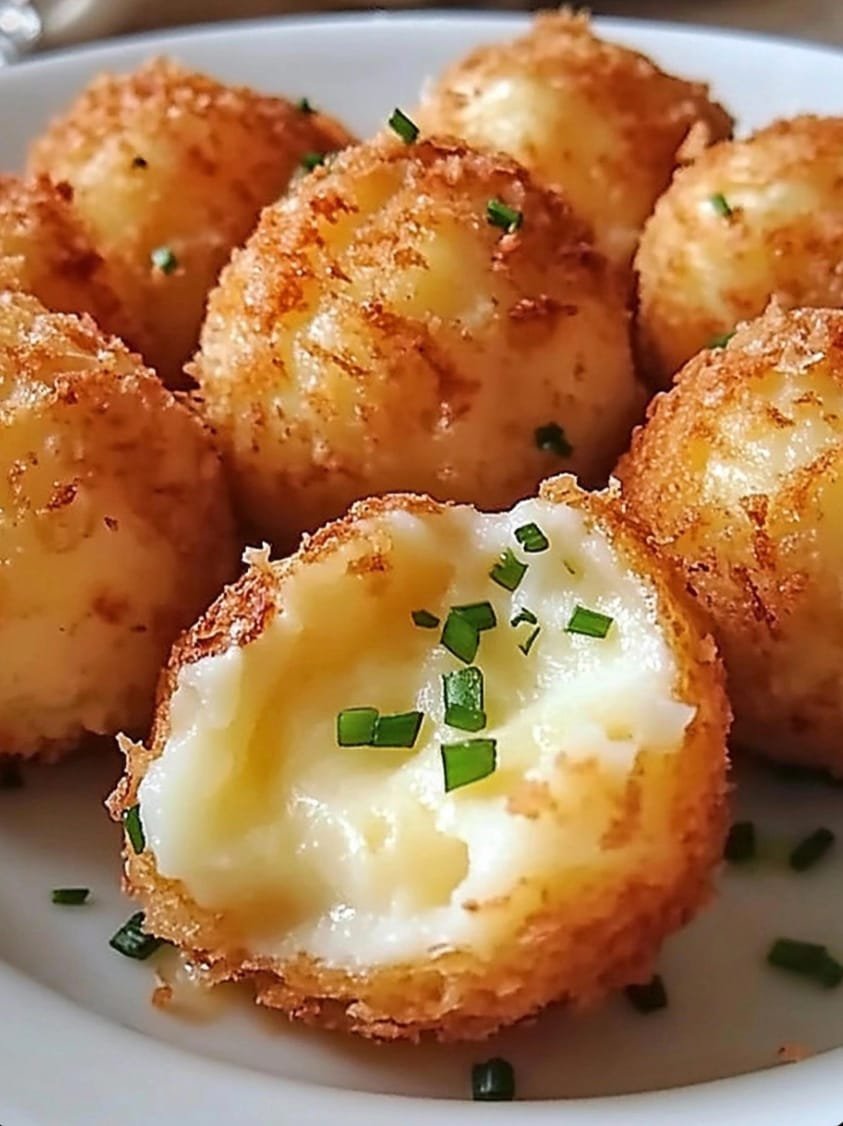
Cheese-Filled Balls are the perfect bite-sized snack that’s crispy on the outside and gooey on the inside. These cheesy delights are great for parties, game-day gatherings, or any time you’re craving something savory and satisfying. Made with simple ingredients, they come together quickly and are sure to impress your family and friends.
Table of Contents
- Introduction
- Ingredients
- Instructions
- Cook Notes
- Variations
- Serving Suggestions
- Frequently Asked Questions
- Conclusion
Ingredients
Main Ingredients
- 2 cups shredded mozzarella cheese
- 1/2 cup grated Parmesan cheese
- 1 cup all-purpose flour
- 1 teaspoon baking powder
- 1/2 teaspoon salt
- 1/2 teaspoon garlic powder
- 1/4 teaspoon black pepper
- 1/4 teaspoon paprika
- 2 large eggs
- 1/2 cup milk
- 1 cup breadcrumbs
- Vegetable oil, for frying
Instructions
Step 1: Prepare the Cheese Mixture
In a large mixing bowl, combine the shredded mozzarella cheese and grated Parmesan cheese. Mix until well combined and set aside.
Step 2: Prepare the Dough
In another bowl, whisk together the all-purpose flour, baking powder, salt, garlic powder, black pepper, and paprika. In a separate small bowl, beat the eggs and add the milk, mixing well. Gradually add the wet ingredients to the flour mixture, stirring until a dough forms.
Step 3: Shape the Cheese-Filled Balls
Take a small portion of dough, flatten it in your hands, and place about 1 teaspoon of the cheese mixture in the center. Wrap the dough around the cheese, forming it into a ball. Repeat until all the dough and cheese are used up.
Step 4: Coat the Balls in Breadcrumbs
Roll each ball in breadcrumbs to fully coat it. Set the coated balls aside on a plate while you heat the oil.
Step 5: Fry the Cheese Balls
In a deep skillet or saucepan, heat about 2 inches of vegetable oil over medium heat until it reaches 350°F (175°C). Fry the cheese-filled balls in batches, cooking for 2-3 minutes or until golden brown and crispy. Be sure to turn them occasionally to ensure even frying.
Step 6: Drain and Serve
Remove the fried cheese balls with a slotted spoon and drain on a paper towel-lined plate. Serve warm with your favorite dipping sauce.
Cook Notes
- Oil Temperature: Make sure the oil stays at a consistent 350°F for the perfect crispiness. Use a thermometer to monitor the temperature if possible.
- Cheese Choice: Mozzarella is great for its gooey texture, but you can also use other cheeses like cheddar or pepper jack for a different flavor profile.
- Breadcrumbs: Use panko breadcrumbs for an extra crispy coating.
Variations
1. Spicy Cheese-Filled Balls
Add 1/2 teaspoon cayenne pepper or 1 finely diced jalapeño to the dough for a spicy kick.
2. Herb and Garlic Cheese Balls
Add 1 tablespoon finely chopped fresh herbs (such as parsley or chives) to the cheese mixture for an herbal twist.
3. Bacon Cheese Balls
Mix in 1/4 cup cooked, crumbled bacon with the cheese mixture for an extra savory flavor.
Serving Suggestions
- Dipping Sauces: Serve with marinara sauce, ranch dressing, or garlic aioli for dipping.
- Party Platter: Arrange the cheese balls on a platter with vegetable sticks and other appetizers for a perfect party spread.
- Garnish: Garnish with grated Parmesan and fresh parsley for an elegant touch.
Frequently Asked Questions
Can I Make These Cheese Balls Ahead of Time?
Yes! You can assemble the cheese-filled balls and refrigerate them for up to 1 day before frying. When ready to serve, fry them directly from the refrigerator.
How Do I Store Leftovers?
Store any leftover cheese-filled balls in an airtight container in the refrigerator for up to 3 days. Reheat in an oven at 350°F (175°C) for about 10 minutes to regain crispiness.
Can I Bake These Instead of Frying?
Yes, you can bake them for a lighter version. Preheat your oven to 400°F (200°C) and bake on a parchment-lined baking sheet for 15-20 minutes, or until golden and crispy.
Cheese-Filled Balls are a fun and irresistible snack that everyone will love. Crispy on the outside, gooey on the inside, and full of flavor, these cheesy bites are perfect for any occasion. Try them out and customize with your favorite flavors and dipping sauces!
Did you make this recipe? Share your experience in the comments below and let us know how it turned out!
