Imagine a dessert that effortlessly combines the natural sweetness of bananas with the creamy richness of condensed milk, topped with fluffy whipped cream and a sprinkle of cinnamon. This recipe is not only easy to make but also incredibly delicious, making it an instant hit in any household. Let’s dive into the details of creating this simple yet delightful banana dessert.
Ingredients:
For the Bananas:
- 4 ripe bananas, cut in half lengthwise
- 1 tablespoon granulated sugar (crystal sugar recommended, but any type will do)
- 395 grams condensed milk
- Ground cinnamon, to taste
For the Whipped Cream:
- 200 grams whipped cream mix
Instructions
1. Prepare the Bananas:
Start by cutting four ripe bananas in half lengthwise. This will ensure that each piece absorbs the flavors well and provides a delightful texture. Set the banana halves aside.
2. Arrange the Base:
In a medium baking dish, sprinkle 1 tablespoon of granulated sugar evenly across the bottom. This sugar layer will caramelize during baking, adding a lovely sweet base to our dessert.
3. Layer the Bananas:
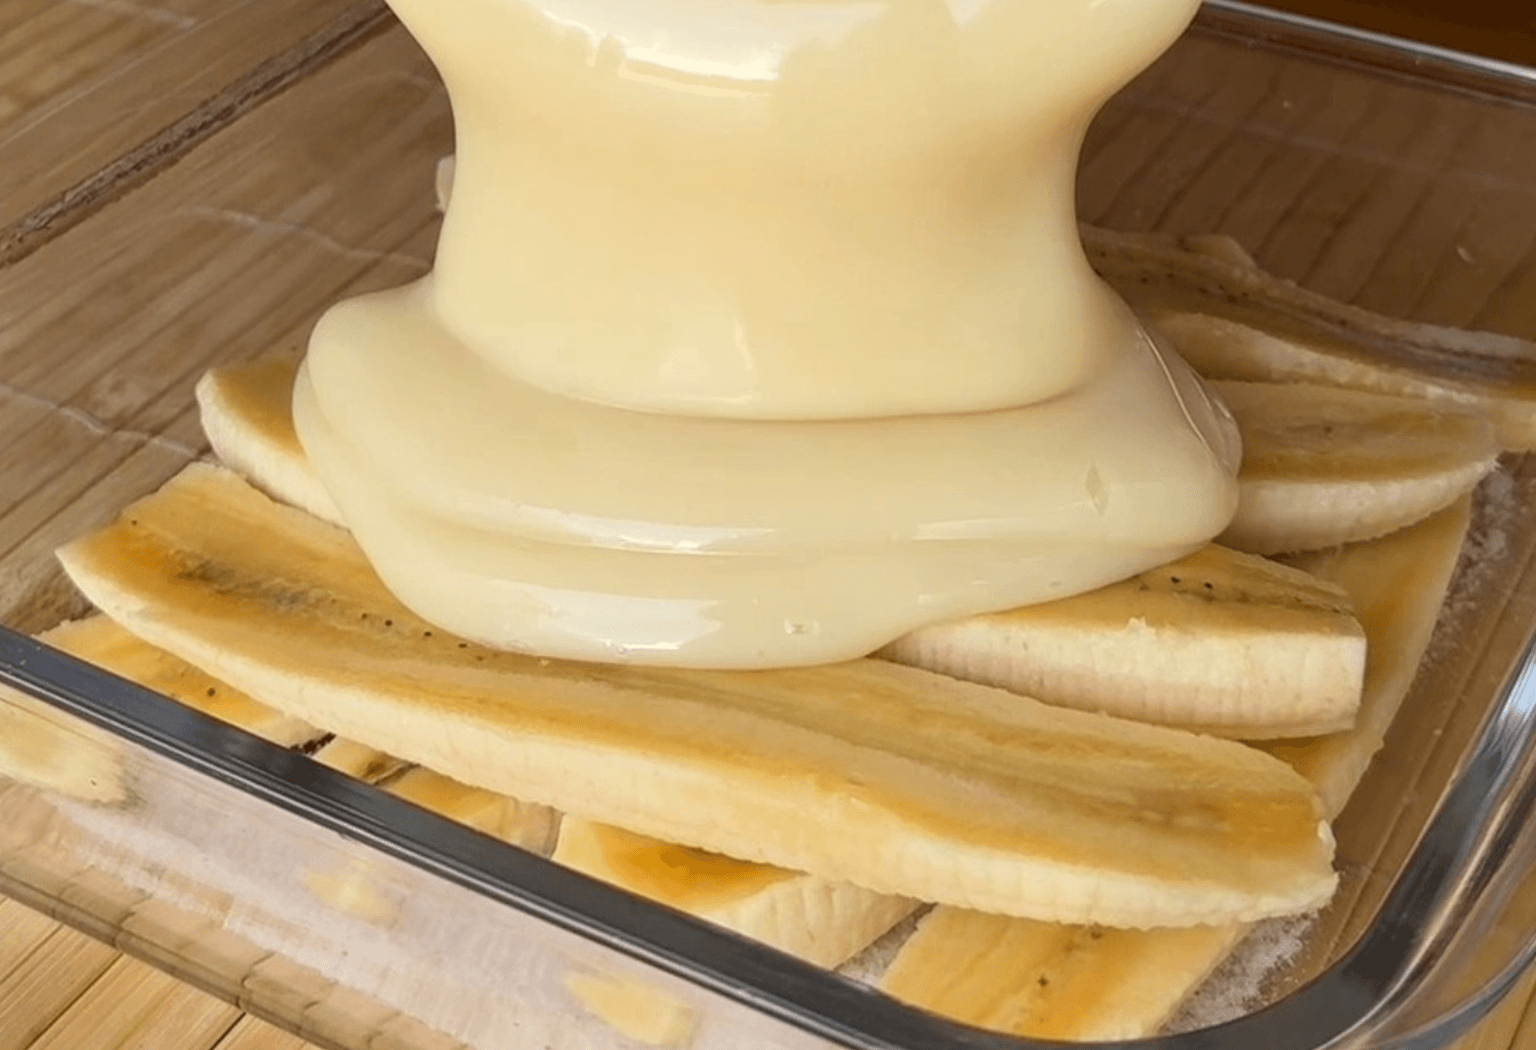
Place the banana halves on top of the sugar in the baking dish. Arrange them side by side in a single layer. Once the first layer is complete, place the remaining banana halves crosswise on top of the first layer. This layering helps to evenly distribute the bananas and ensures that every bite has a consistent flavor and texture.
4. Add the Condensed Milk:
Pour 395 grams of condensed milk over the layered bananas, ensuring they are thoroughly covered. The condensed milk will seep into the bananas, making them tender and adding a rich, sweet flavor. Sprinkle a little ground cinnamon over the top. The amount of cinnamon can be adjusted to taste; if you’re not a fan of cinnamon, you can omit it, but it does add a wonderful depth of flavor.
5. Bake the Bananas:
Preheat your oven to 180°C (350°F). Place the baking dish in the preheated oven and bake for 30 minutes. During this time, the bananas will soften and the condensed milk will create a luscious, caramel-like sauce. The sugar on the bottom will also caramelize, adding a delightful crunch.
6. Prepare the Whipped Cream:
While the bananas are baking, it’s time to prepare the whipped cream. In a bowl, add 200 grams of whipped cream mix. Using a mixer, beat the whipped cream mix until it doubles in size and forms stiff peaks. This will take about 3-5 minutes. The whipped cream will add a light and airy texture to the dessert, balancing the richness of the condensed milk and bananas.
7. Assemble the Dessert:
Once the bananas are roasted and the condensed milk has caramelized beautifully, remove the dish from the oven. Allow it to cool slightly. Pour the prepared whipped cream over the roasted bananas and condensed milk. Use a spatula to spread the whipped cream evenly across the top, creating a smooth layer.
8. Chill the Dessert:
For the best results, refrigerate the assembled dessert for at least 2 hours. Chilling allows the flavors to meld together and the whipped cream to set properly, resulting in a more cohesive and enjoyable dessert.
9. Serve and Enjoy:
After chilling, your dessert is ready to be served. Scoop out a piece and enjoy the perfect combination of creamy, sweet, and slightly spiced flavors. The texture of the softened bananas, the richness of the caramelized condensed milk, and the lightness of the whipped cream make this dessert irresistible.
Cooking Notes
- Banana Ripeness: Choose ripe bananas for this recipe as they are sweeter and will soften nicely during baking.
- Sugar Type: While crystal sugar is recommended for its texture, feel free to use any sugar you prefer.
- Cinnamon: Adjust the amount of cinnamon to your liking. If you’re not a fan, you can leave it out.
Frequently Asked Questions
1. Can I use a different type of fruit for this recipe? Yes, you can experiment with other fruits such as peaches or apples. Adjust the baking time as needed since different fruits may require different cooking times.
2. How can I make this dessert dairy-free? You can use coconut condensed milk and a dairy-free whipped cream alternative to make this recipe suitable for those who are lactose intolerant or following a vegan diet.
3. Can I prepare this dessert in advance? Absolutely! This dessert can be made a day ahead. Just keep it covered in the refrigerator and add the whipped cream topping shortly before serving.
4. How do I store leftovers? Store any leftovers in an airtight container in the refrigerator for up to 3 days. The dessert tastes great even after a couple of days.
5. Can I add other toppings? Feel free to add toppings like chopped nuts, chocolate shavings, or a drizzle of caramel sauce for extra flavor and texture.
Keto/Low Carb Version
For those following a keto or low-carb diet, you can modify this recipe by using a low-carb sweetener and whipped cream:
Ingredients:
- 4 ripe bananas, cut in half lengthwise
- 1 tablespoon erythritol or other low-carb sweetener
- 395 grams sugar-free condensed milk
- Ground cinnamon, to taste
- 200 grams heavy whipping cream (or a keto-friendly whipped cream mix)
Instructions: Follow the same instructions as the original recipe, substituting the low-carb sweetener for sugar and using sugar-free condensed milk. Whip the heavy cream without added sugar for the topping.
Perfectly Roasted Garlic Parmesan Potatoes are the ultimate side dish, combining crispy exteriors with a savory garlic-Parmesan flavor. They’re easy to make and versatile enough to complement any meal. Whether you’re enjoying a casual dinner or hosting a special event, these potatoes are sure to be a hit.
Call to Action: Ready to try this recipe? Gather your ingredients and give these roasted garlic Parmesan potatoes a go. Don’t forget to share your results on social media and tag us. We’d love to see your delicious creations!
Enjoy making and indulging in these roasted garlic Parmesan potatoes!
