If you’re looking for a quick, nutritious, and delicious snack, look no further than these No Bake Oatmeal Peanut Butter Bars. Perfect for busy lifestyles and families on the go, these bars are packed with wholesome ingredients that provide energy and satisfaction. What makes this recipe special is its simplicity; with no baking required, you can whip up a batch in no time. Plus, they’re customizable to suit your taste and dietary preferences, making them a staple in any healthy kitchen. Whether you’re craving a sweet treat or need a healthy snack to fuel your day, these bars are the answer! Not only do they deliver on flavor, but they also offer a nutritional punch, rich in fiber, protein, and healthy fats that can keep hunger at bay. The combination of oats and peanut butter creates a delightful texture that is hard to resist, making them not just a snack but a wholesome indulgence. Additionally, these bars are ideal for meal prepping, allowing you to enjoy a nutritious snack that’s ready when you are. With the right storage methods, these bars can last throughout the week, ensuring you have a healthy option readily available.
Ingredients
Gather the following ingredients to make a batch of No Bake Oatmeal Peanut Butter Bars: You can learn more about this topic. These ingredients work harmoniously to create the perfect balance of flavor and nutrition:
- Dry Ingredients:
- 2 cups rolled oats – Choose old-fashioned rolled oats for the best texture; they provide a hearty base and are rich in dietary fiber, which is good for digestion. They offer a chewy consistency that complements the creaminess of the peanut butter.
- 1 cup crispy rice cereal – This adds a delightful crunch and lightness to the bars, making them interesting to eat. The cereal contributes a fun texture that contrasts beautifully with the creaminess of the peanut butter, making each bite satisfying and enjoyable.
- 1/2 cup chocolate chips (optional) – Dark chocolate chips are a great choice for added antioxidants. They bring a touch of sweetness and richness that complements the other ingredients wonderfully. Using semi-sweet chips can also add a nice balance to the flavors.
- 1/2 cup chopped nuts (almonds, walnuts, or your choice) – Nuts add healthy fats and protein; feel free to mix and match according to your preferences. They also enhance the nutritional value of the bars, providing essential vitamins and minerals. Toasting the nuts beforehand can further elevate their flavor.
- Wet Ingredients:
- 1 cup natural peanut butter (creamy or crunchy) – Opt for natural peanut butter with no added sugars or oils for the healthiest option. This ensures that you’re getting pure peanut flavor and maximizing the health benefits, contributing to the bar’s gooey texture.
- 1/2 cup honey or maple syrup – Both sweeteners provide moisture; honey adds a distinct flavor, while maple syrup lends a unique sweetness. Their natural sweetness balances the hearty oats and nuts perfectly, adding a rich depth to the overall flavor profile.
- 1 teaspoon vanilla extract – This enhances the overall flavor profile, making the bars even more delightful and aromatic. The vanilla adds a subtle complexity that elevates the taste experience, making each bite aromatic and inviting.
Note: For a healthier option, you can substitute honey with agave syrup or use almond butter instead of peanut butter for a different flavor profile. Make sure to choose gluten-free oats if required, ensuring that everyone can enjoy these bars. Check out our related guide for more tips on variations and ingredient substitutions that can elevate your No Bake Oatmeal Peanut Butter Bars. Remember, the quality of your ingredients can significantly impact the flavor and texture of the final product, so select fresh, high-quality items whenever possible. Consider organic options for the oats and sweeteners to enhance the nutritional benefits.
Steps / Instructions
- Prepare the pan: Line an 8-inch square baking dish with parchment paper, allowing some overhang for easy removal later. This ensures that your bars won’t stick, making for an effortless cleanup. Be sure to press the parchment paper into the corners to ensure an even surface for your bars. This little detail will pay off when you go to slice them.
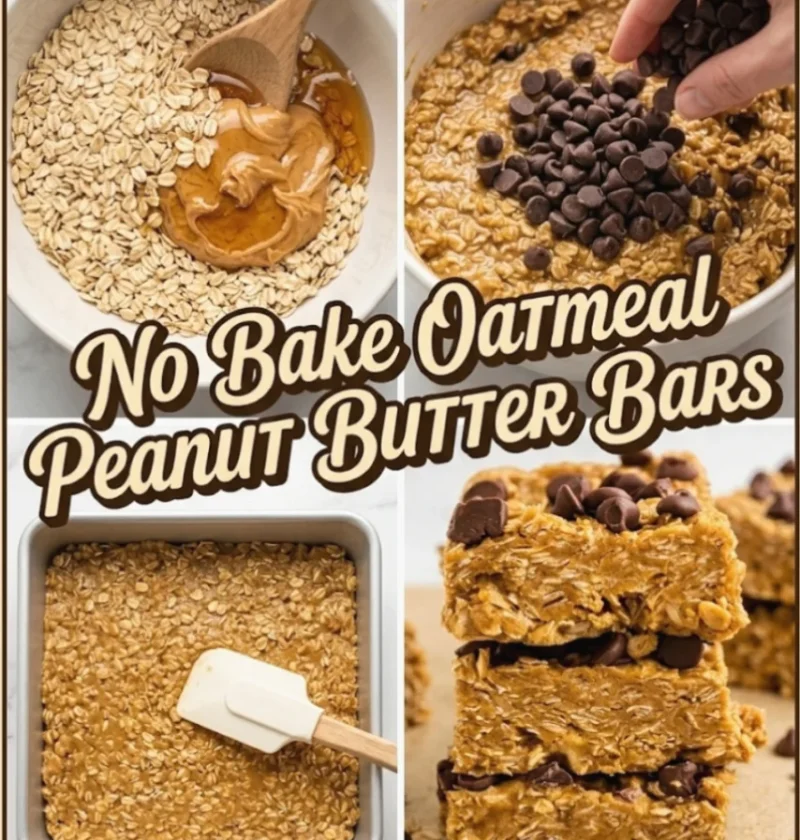
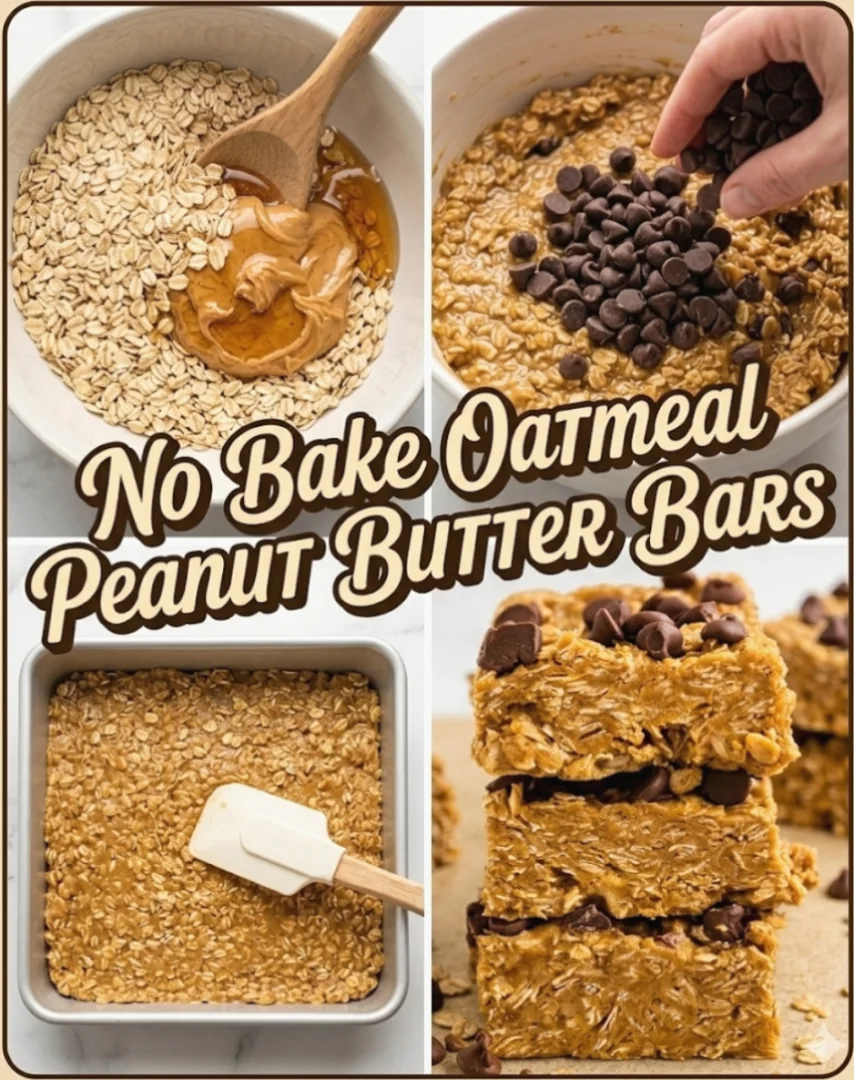
- Mix dry ingredients: In a large mixing bowl, combine the rolled oats, crispy rice cereal, chocolate chips, and chopped nuts. Stir well to ensure everything is evenly distributed. This step is crucial, as it ensures that every bite is packed with flavor and texture. Take a moment to break up any clumps in the oats or cereal, ensuring a uniform mixture. A whisk can help break down any larger clumps for a smoother blend.
- Combine wet ingredients: In a separate bowl, mix together the peanut butter, honey, and vanilla extract. Use a microwave if the peanut butter is too thick, heating it for 20-30 seconds until it’s easier to stir. This will help in achieving a smooth consistency that blends well with the dry ingredients. Make sure the mixture is homogenous for optimal flavor distribution, creating a cohesive base for your bars.
- Combine mixtures: Pour the wet mixture over the dry ingredients. Stir with a spatula until everything is well coated and combined. The mixture should be sticky but hold together; if it feels too crumbly, consider adding a bit more honey or peanut butter to achieve the right texture. Be thorough in mixing to ensure that all dry ingredients are incorporated, allowing every piece of oat and nut to be enveloped in the delicious peanut butter mixture.
- Press into the pan: Transfer the mixture to the prepared baking dish. Use your hands or the back of a spatula to press it down firmly into an even layer. This step is crucial for ensuring the bars hold their shape once cut; the more compact the layer, the sturdier your bars will be. Try to make the layer as smooth as possible for an appealing final product. You can lightly dampen your hands to prevent sticking during this process.
- Chill: Place the baking dish in the refrigerator for at least 1-2 hours. This will help the bars to set properly, allowing the flavors to meld together beautifully. If you’re in a hurry, a 30-minute chill in the freezer can also work. The chilling process is vital, as it solidifies the peanut butter mixture, giving the bars their structure. A properly chilled bar will have a firmer texture that’s easier to slice.
- Cut and serve: Once set, lift the bars out using the parchment paper overhang. Cut into squares or rectangles as desired. Enjoy your No Bake Oatmeal Peanut Butter Bars! They make for a perfect snack or a quick breakfast on busy mornings. You can wrap them individually for a convenient grab-and-go option, making them perfect for lunch boxes or road trips. Serve with a glass of milk or a fruit smoothie for a balanced snack.
Tips & Tricks
To achieve the best results with your No Bake Oatmeal Peanut Butter Bars:
- Storage: Store the bars in an airtight container in the refrigerator for up to one week. They can also be frozen for up to three months; just make sure to separate layers with parchment paper to prevent sticking. This way, you can always have a nutritious snack ready when you need it. For a quick thaw, simply leave them at room temperature for a few minutes before enjoying, or microwave them briefly for added warmth.
- Make-ahead: These bars are great for meal prep! Prepare a batch over the weekend to have nutritious snacks ready for busy weekdays. They are ideal for on-the-go breakfasts or a midday energy boost. You can also experiment with different add-ins each week to keep things exciting, such as dried fruit or seeds.
- Common mistakes: Ensure that the mixture is well combined; if it’s too dry, add a bit more peanut butter or honey to achieve a uniform consistency. If it’s too wet, you may need to add more oats or cereal to help absorb excess moisture, creating a balanced texture. Additionally, don’t skip the chilling step, as it’s essential for proper texture. Proper mixing is key to ensuring that every bar has the same flavor profile.
- Pro techniques: For an added flavor dimension, consider adding a pinch of salt or a sprinkle of cinnamon to the mixture. You could also experiment by mixing in seeds like chia or flaxseed for an extra nutrient boost. These small adjustments can elevate your No Bake Oatmeal Peanut Butter Bars to the next level of deliciousness, making them a unique treat each time.
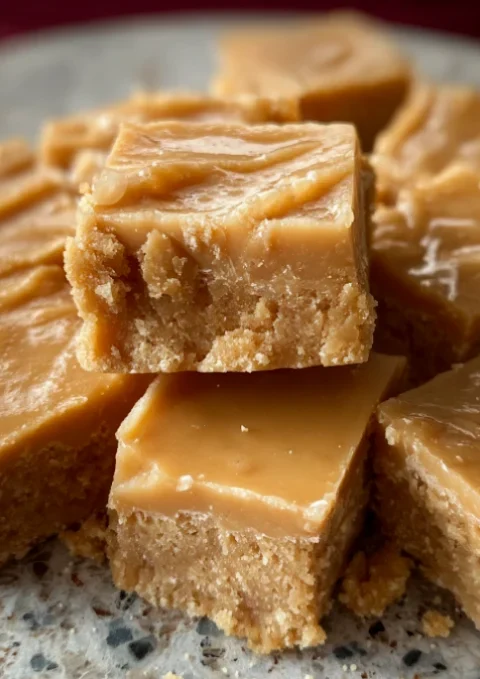
No Bake Oatmeal Peanut Butter Bars
If you’re looking for a quick, nutritious, and delicious snack, look no further than these No Bake Oatmeal Peanut Butter Bars. Perfect for busy lifestyles and families on the go, these bars are packed with wholesome ingredients that provide energy and satisfaction.
Ingredients
- 2 cups rolled oats
- 1 cup crispy rice cereal
- 1/2 cup chocolate chips (optional)
- 1/2 cup chopped nuts (almonds, walnuts, or your choice)
- 1 cup natural peanut butter (creamy or crunchy)
- 1/2 cup honey or maple syrup
- 1 teaspoon vanilla extract
Directions
Prepare the pan: Line an 8-inch square baking dish with parchment paper, allowing some overhang for easy removal later.
Mix dry ingredients: In a large mixing bowl, combine the rolled oats, crispy rice cereal, chocolate chips, and chopped nuts. Stir well.
Combine wet ingredients: In a separate bowl, mix together the peanut butter, honey, and vanilla extract. Use a microwave if needed.
Combine mixtures: Pour the wet mixture over the dry ingredients. Stir with a spatula until everything is well coated and combined.
Press into the pan: Transfer the mixture to the prepared baking dish. Press it down firmly into an even layer.
Chill: Place the baking dish in the refrigerator for at least 1-2 hours to set.
Cut and serve: Lift the bars out using the parchment paper overhang and cut into squares or rectangles.
Nutrition Facts
Recipe Reviews
- ★★★★★
Excellent recipe!
Leave a Reply
Your email address will not be published. Required fields are marked *