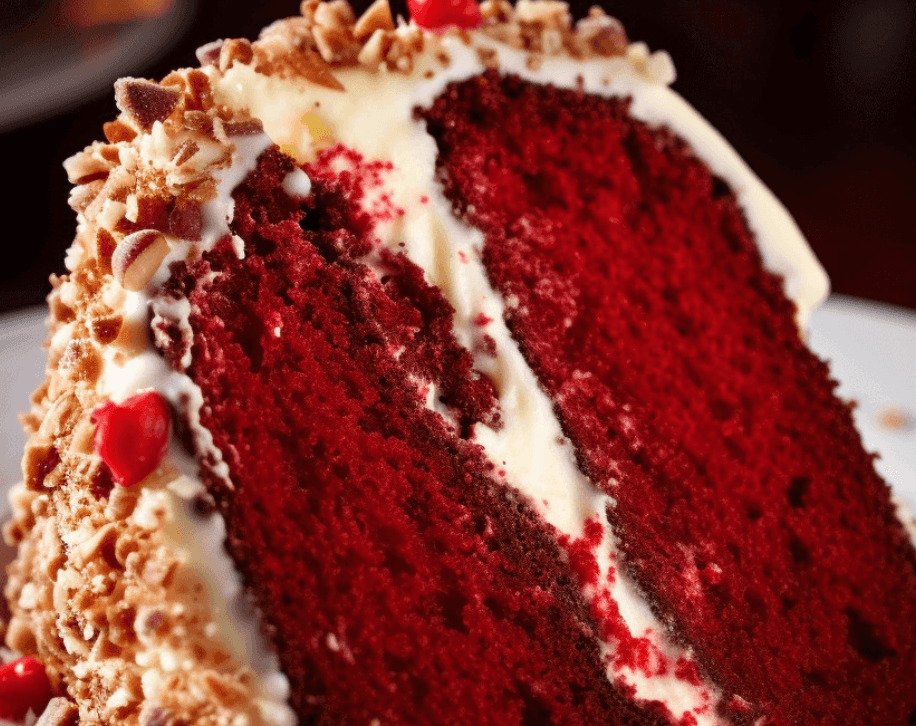
Red Velvet Pound Cake is a delightful twist on the classic red velvet cake, combining the rich, velvety texture of pound cake with the deep red color and subtle cocoa flavor of red velvet. This cake is perfect for any celebration, whether it’s a birthday, holiday, or just because. With a simple list of ingredients and easy-to-follow steps, you can create a stunning and delicious cake that will impress your family and friends. Let’s dive into the recipe and learn how to make this mouthwatering Red Velvet Pound Cake step-by-step.
Ingredients
- 4 large eggs
- 1 box of Red Velvet Cake Mix
- 1 package (4.3 ounces) dry white chocolate instant pudding mix
- 1 teaspoon vanilla extract
- 1 1/2 cups water
- 1/2 cup vegetable oil
Instructions
Step 1: Prepare the Batter
- Preheat Oven: Preheat your oven to 350°F (175°C). Grease and flour a bundt pan or a loaf pan.
- Mix Eggs: In a large mixing bowl, beat the eggs until they are light and frothy.
- Add Cake Mix and Pudding Mix: Add the box of red velvet cake mix and the package of dry white chocolate instant pudding mix to the beaten eggs. Mix well to combine.
- Add Vanilla Extract: Stir in the vanilla extract.
- Add Water and Oil: Gradually add the water and vegetable oil to the mixture, stirring until the batter is smooth and well combined.
Step 2: Bake the Cake
- Pour Batter into Pan: Pour the batter into the prepared bundt or loaf pan, spreading it evenly.
- Bake: Place the pan in the preheated oven and bake for 45-55 minutes, or until a toothpick inserted into the center of the cake comes out clean.
- Cool: Remove the cake from the oven and allow it to cool in the pan for 10 minutes. Then, invert the cake onto a wire rack to cool completely.
Serving
- Serve: Once the cake is completely cool, slice and serve. This cake is delicious on its own, but you can also add a dollop of whipped cream, a scoop of vanilla ice cream, or a drizzle of cream cheese glaze for an extra touch of indulgence.
Cooking Notes
- Pan Choice: A bundt pan will give you a beautifully shaped cake, but a loaf pan works just as well. Adjust the baking time if using a different type of pan.
- Mixing: Be sure to mix the batter thoroughly to ensure the pudding mix is well incorporated and there are no lumps.
- Cooling: Allowing the cake to cool in the pan for a few minutes helps it set and makes it easier to remove from the pan without breaking.
Frequently Asked Questions
Q: Can I use a different flavor of pudding mix? A: Yes, you can experiment with different pudding flavors to create your unique twist on this cake. Vanilla or cheesecake pudding mixes are good alternatives.
Q: How do I store leftovers? A: Store any leftover cake in an airtight container at room temperature for up to 3 days, or in the refrigerator for up to 5 days.
Q: Can I freeze this cake? A: Yes, you can freeze the cake. Wrap it tightly in plastic wrap and aluminum foil, then freeze for up to 3 months. Thaw in the refrigerator overnight before serving.
Keto/Low Carb Version
To make a keto or low-carb version of this recipe, follow these modifications:
- Cake Mix: Use a keto-friendly red velvet cake mix.
- Pudding Mix: Substitute the white chocolate pudding mix with a low-carb or sugar-free instant pudding mix.
- Sugar Substitutes: Use erythritol or monk fruit sweetener in place of sugar if making your own cake mix.
Red Velvet Pound Cake is a stunning and delicious dessert that’s perfect for any occasion. With its rich flavor, moist texture, and vibrant color, this cake is sure to be a hit. Try this recipe today and enjoy a slice of homemade goodness that will delight your taste buds and impress your guests.
Did you enjoy this Red Velvet Pound Cake recipe? Share your experience in the comments below and tag us on social media with your delicious creations! For more tasty and easy recipes, subscribe to our blog and follow us for the latest updates. Happy baking!


