Introduction
Imagine a luscious dessert that combines the rich flavors of tiramisu with the creamy goodness of ice cream. Introducing the Tiramisu Ice Cream Cake – a delightful treat that will satisfy your sweet tooth and leave you craving for more. This recipe takes the classic Italian dessert to a whole new level by adding layers of velvety ice cream and a hint of coffee. Whether you’re a tiramisu lover or an ice cream enthusiast, this cake is guaranteed to impress.
Why You’ll Love This Recipe
There are several reasons why this Tiramisu Ice Cream Cake is a must-try. Firstly, it’s incredibly easy to make, requiring only a few simple ingredients. Secondly, it’s a versatile dessert that can be enjoyed on any occasion, from birthdays to dinner parties. Lastly, the combination of flavors is simply divine – the sweetness of the ice cream perfectly balances the boldness of the coffee, resulting in a harmonious and indulgent treat.
Ingredients
To make this Tiramisu Ice Cream Cake, you will need the following ingredients:
- 1 pint of coffee-flavored ice cream
- 1/2 cup of brewed espresso or strong coffee
- 24 ladyfinger cookies
- 1 cup of mascarpone cheese
- 1/2 cup of powdered sugar
- 1 teaspoon of vanilla extract
- 1/4 cup of cocoa powder
Note: You can also substitute the coffee-flavored ice cream with your favorite flavor, such as chocolate or vanilla. Feel free to get creative and experiment with different combinations.
Step-by-Step Instructions
Follow these simple steps to create your own Tiramisu Ice Cream Cake:
- Start by brewing a strong cup of espresso or coffee. Set it aside to cool.
- In a mixing bowl, combine the mascarpone cheese, powdered sugar, and vanilla extract. Mix until smooth and creamy.
- Dip each ladyfinger cookie into the cooled coffee, making sure to coat both sides. Arrange a layer of soaked ladyfingers at the bottom of a loaf pan or cake tin.
- Spoon a layer of the mascarpone mixture on top of the ladyfingers, spreading it evenly.
- Take the coffee-flavored ice cream out of the freezer and allow it to soften slightly. Once softened, spread a layer of ice cream on top of the mascarpone mixture.
- Repeat the layers, starting with the soaked ladyfingers, followed by the mascarpone mixture, and finally the ice cream. Continue layering until you run out of ingredients, ensuring that the top layer is ice cream.
- Sprinkle the cocoa powder over the top layer of ice cream, using a sieve or sifter for an even dusting.
- Cover the cake with foil or plastic wrap and place it in the freezer for at least 4 hours, or until firm.
- When ready to serve, remove the Tiramisu Ice Cream Cake from the freezer and let it sit at room temperature for a few minutes to soften slightly. Slice and enjoy!
Expert Tips for Success
Here are some expert tips to ensure your Tiramisu Ice Cream Cake turns out perfectly:
- Make sure to brew a strong cup of coffee or espresso for maximum flavor.
- Soak the ladyfinger cookies briefly to prevent them from getting too soggy.
- Allow the ice cream to soften slightly before spreading it in between the layers.
- Use a sharp knife to slice the cake for clean and even portions.
- For an extra touch of decadence, drizzle some chocolate sauce or sprinkle shaved chocolate on top before serving.
Variations and Substitutions
If you’d like to put a twist on the classic Tiramisu Ice Cream Cake, here are some variations you can try:
- For a fruity twist, add a layer of sliced strawberries or raspberries in between the ladyfingers and mascarpone mixture.
- For a chocolate lover’s dream, use chocolate-flavored ladyfinger cookies and chocolate ice cream.
- If you prefer a lighter option, substitute the mascarpone cheese with Greek yogurt or whipped cream.
- To cater to dietary restrictions, use gluten-free ladyfinger cookies and dairy-free ice cream alternatives.
Serving Suggestions
To fully enjoy the flavors of the Tiramisu Ice Cream Cake, consider serving it with a few accompaniments:
- Dust the serving plates with cocoa powder for an elegant presentation.
- Pair the cake with a strong cup of coffee or a shot of espresso to enhance the coffee flavor.
- Add a dollop of whipped cream or a scoop of vanilla ice cream on top for extra indulgence.
FAQs
Here are answers to some common questions about making Tiramisu Ice Cream Cake:
Can I make this recipe ahead of time?
Yes, you can prepare the Tiramisu Ice Cream Cake a day in advance. Simply cover it tightly with foil or plastic wrap and store it in the freezer until ready to serve.
Can I use instant coffee instead of brewed espresso?
While brewed espresso or strong coffee is recommended for the best flavor, you can use instant coffee as a substitute. Dissolve 1 tablespoon of instant coffee granules in 1/2 cup of hot water and let it cool before using.
How long does the Tiramisu Ice Cream Cake last in the freezer?
The cake can be stored in the freezer for up to a week. However, for the best texture and flavor, it is recommended to consume it within 3-4 days.
Final Thoughts
The Tiramisu Ice Cream Cake is a true delight for dessert lovers. With its creamy layers of ice cream, coffee-soaked ladyfingers, and rich mascarpone, it’s a dessert that never fails to impress. Whether you’re hosting a special occasion or simply treating yourself, this recipe is guaranteed to satisfy your cravings. So go ahead, gather the ingredients, and indulge in a slice of this heavenly cake. Your taste buds will thank you!
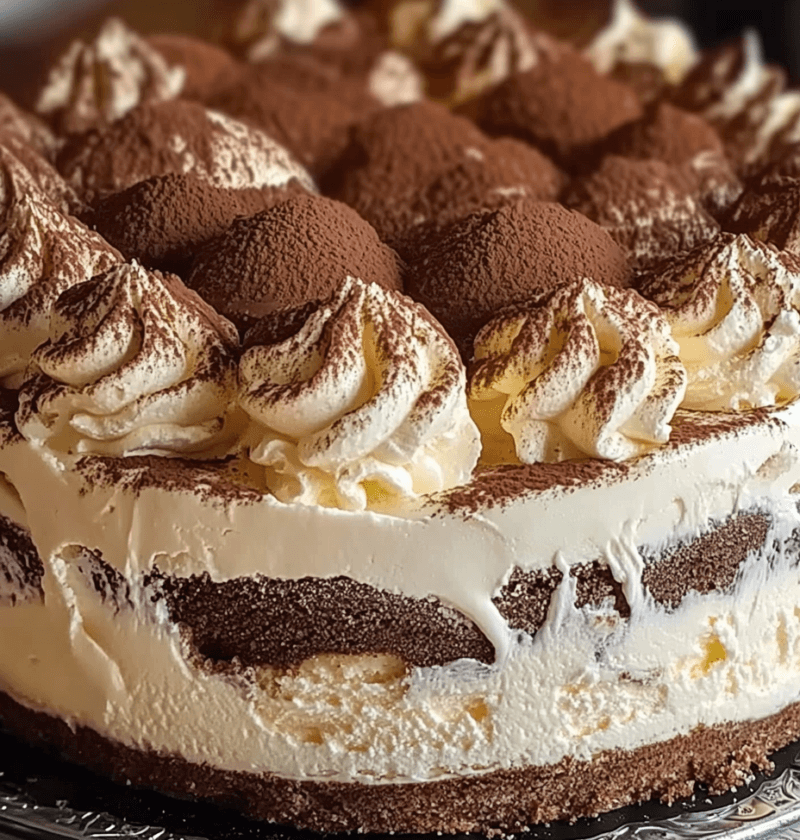
Tiramisu Ice Cream Cake
A luscious dessert that combines the rich flavors of tiramisu with the creamy goodness of ice cream. This cake features layers of velvety ice cream, coffee-soaked ladyfingers, and a mascarpone cheese mixture, topped with cocoa powder.
Ingredients
- 1 pint coffee-flavored ice cream
- 1/2 cup brewed espresso or strong coffee
- 24 ladyfinger cookies
- 1 cup mascarpone cheese
- 1/2 cup powdered sugar
- 1 teaspoon vanilla extract
- 1/4 cup cocoa powder
Directions
- Start by brewing a strong cup of espresso or coffee. Set it aside to cool.
- In a mixing bowl, combine mascarpone cheese, powdered sugar, and vanilla extract. Mix until smooth and creamy.
- Dip each ladyfinger cookie into the cooled coffee, then arrange a layer of soaked ladyfingers at the bottom of a loaf pan or cake tin.
- Spoon a layer of mascarpone mixture on top of the ladyfingers, spreading it evenly.
- Soften the coffee-flavored ice cream slightly, then spread a layer on top of the mascarpone mixture.
- Repeat the layers, starting with soaked ladyfingers, followed by mascarpone mixture, and finally ice cream. Continue layering until all ingredients are used, with the top layer being ice cream.
- Sprinkle cocoa powder over the top layer of ice cream using a sieve or sifter for even dusting.
- Cover the cake with foil or plastic wrap and freeze for at least 4 hours until firm.
- Before serving, let the cake sit at room temperature for a few minutes to soften slightly, then slice and enjoy!