Granny’s Cocoa Cream Pie Recipe
Introduction
Welcome to our delicious Granny’s Cocoa Cream Pie recipe. This classic dessert is a favorite among family and friends. The rich and creamy filling combined with a buttery, flaky crust will surely satisfy your sweet tooth. Whether you are an experienced baker or a beginner in the kitchen, this recipe is easy to follow and guaranteed to impress.
Ingredients
For the crust:
– 1 ¼ cups all-purpose flour
– ½ teaspoon salt
– ½ cup unsalted butter, cold and cubed
– 2-3 tablespoons ice water
For the filling:
– ¾ cup granulated sugar
– ⅓ cup unsweetened cocoa powder
– ¼ cup cornstarch
– ¼ teaspoon salt
– 3 cups whole milk
– 4 large egg yolks
– 2 tablespoons unsalted butter
– 1 teaspoon vanilla extract
Steps
Step 1: Preparing the crust
In a large mixing bowl, combine the all-purpose flour and salt. Add the cold, cubed butter and use a pastry cutter or your hands to cut the butter into the flour until the mixture resembles coarse crumbs. Gradually add the ice water, one tablespoon at a time, and mix until the dough comes together. Form the dough into a disk, wrap it in plastic wrap, and refrigerate for at least 30 minutes.
Step 2: Rolling out the crust
Preheat the oven to 375°F (190°C). On a lightly floured surface, roll out the chilled dough into a circle that is about 12 inches in diameter. Carefully transfer the dough to a 9-inch pie dish and press it into the bottom and sides. Trim any excess dough and crimp the edges.
Step 3: Baking the crust
Line the pie crust with parchment paper or aluminum foil and fill it with pie weights or dried beans. Bake for about 15 minutes, then remove the weights and parchment paper. Continue baking for another 10-12 minutes, or until the crust is golden brown. Remove from the oven and let it cool completely.
Step 4: Preparing the filling
In a medium saucepan, whisk together the granulated sugar, cocoa powder, cornstarch, and salt. In a separate bowl, whisk together the milk and egg yolks. Gradually pour the milk mixture into the saucepan, whisking constantly.
Step 5: Cooking the filling
Cook the mixture over medium heat, stirring constantly, until it thickens and comes to a boil. Continue cooking for an additional 2 minutes, then remove from heat. Stir in the butter and vanilla extract until well combined.
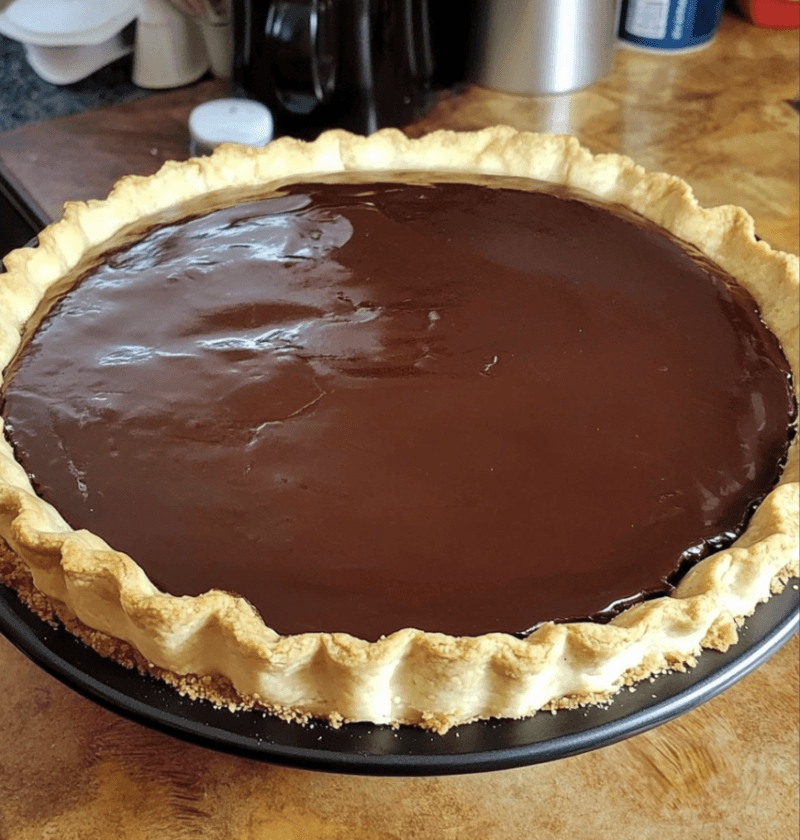
Step 6: Assembling the pie
Pour the filling into the cooled pie crust and smooth the top with a spatula. Place a piece of plastic wrap directly on the surface of the filling to prevent a skin from forming. Refrigerate for at least 4 hours, or until the filling is set.
Step 7: Serving
Before serving, you can add a dollop of whipped cream and a sprinkle of cocoa powder on top of the pie for an extra touch of sweetness. Slice and enjoy!
Keto and Low Carb Variations
If you are following a keto or low carb diet, you can still enjoy a delicious cocoa cream pie with a few modifications to the recipe.
– For the crust, substitute almond flour or coconut flour for the all-purpose flour.
– For the filling, use a sugar substitute instead of granulated sugar and a low carb thickener like xanthan gum instead of cornstarch.
– Be mindful of the milk you use, opting for unsweetened almond milk or coconut milk to reduce the carb content.
With these simple adjustments, you can indulge in a keto or low carb version of Granny’s Cocoa Cream Pie.
Tips
Here are some tips to ensure your Granny’s Cocoa Cream Pie turns out perfectly:
– When making the crust, make sure the butter is cold and cubed. This will help create a flaky texture.
– Use a pie weight or dried beans to prevent the crust from puffing up while baking.
– Whisk the filling constantly while cooking to avoid lumps and ensure a smooth consistency.
– Make sure the pie is fully chilled and set before serving to achieve the best texture.
– Feel free to experiment with different toppings like chocolate shavings or a drizzle of caramel sauce.
Conclusion
Granny’s Cocoa Cream Pie is a timeless dessert that brings back memories of family gatherings and special occasions. With its rich, chocolatey filling and buttery crust, it’s a treat that everyone will love. Whether you follow the classic recipe or make a keto or low carb variation, this pie is sure to be a crowd-pleaser. So go ahead and give it a try – your taste buds will thank you!
FAQs
1. Can I use a store-bought crust instead of making it from scratch?
Yes, you can use a pre-made crust if you prefer. Just make sure to follow the package instructions for baking.
2. How long can I store the pie in the refrigerator?
The pie can be stored in the refrigerator for up to 3 days. Cover it with plastic wrap or place it in an airtight container to keep it fresh.
3. Can I freeze the pie?
Yes, you can freeze the pie for up to 2 months. Wrap it tightly in plastic wrap and place it in a freezer-safe container. Thaw it in the refrigerator before serving.