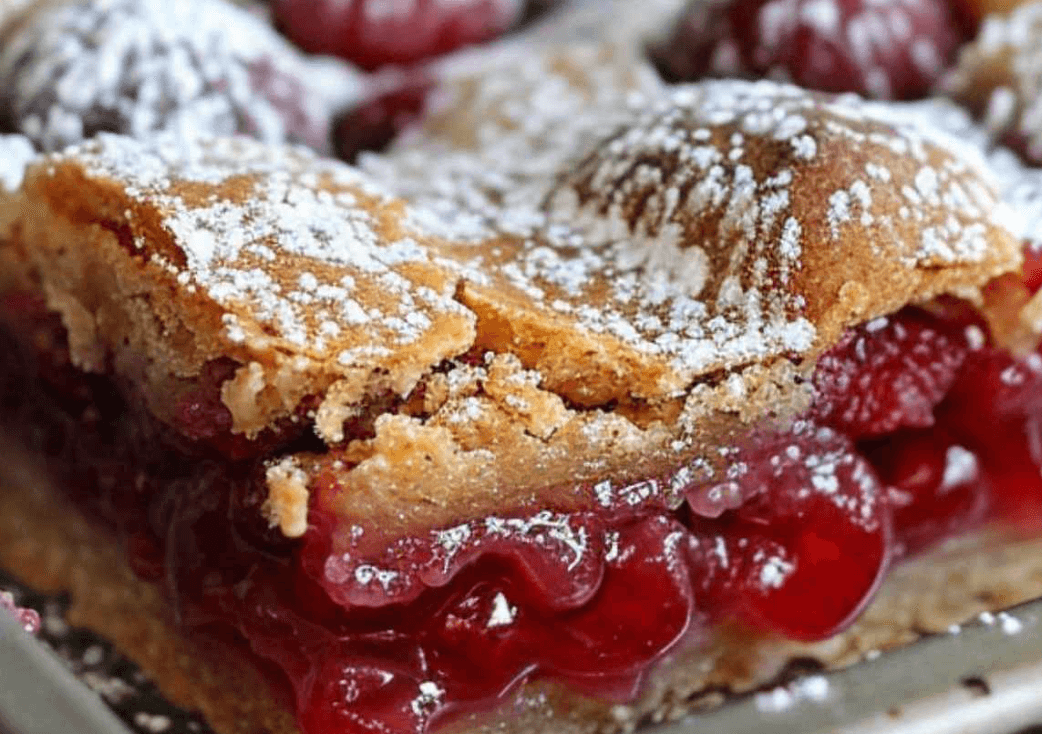
Cherry Pie Bars are the perfect combination of sweet and tart flavors, making them a crowd-pleasing dessert for any occasion. These bars feature a buttery, tender crust, a rich cherry filling, and a soft, cake-like topping. Topped with a dusting of powdered sugar, these Cherry Pie Bars are not only delicious but also visually appealing. Whether you’re preparing for a potluck, a holiday gathering, or just a sweet treat for yourself, these bars are sure to become a favorite.
Ingredients for Irresistible Cherry Pie Bars
- 1 cup butter, softened: Adds richness and helps create a tender crumb.
- 2 cups sugar: Sweetens the bars and balances the tartness of the cherries.
- 4 eggs: Provides structure and moisture to the bars.
- 1 teaspoon vanilla extract: Enhances the flavor with a warm, sweet note.
- 1/4 teaspoon almond extract: Adds a subtle, nutty flavor that pairs beautifully with cherries.
- 3 cups all-purpose flour: Provides structure to the bars.
- 1 teaspoon salt: Balances the sweetness and enhances the overall flavor.
- 1 (21 oz) can cherry pie filling: The star ingredient, bringing sweet and tart cherry goodness to the bars.
- Powdered sugar for dusting (optional): Adds a decorative, sweet finish.
Instructions: How to Make Irresistible Cherry Pie Bars
Step 1: Preheat the Oven
- Preheat your oven to 350°F (175°C). Grease a 9×13-inch baking dish or line it with parchment paper for easy removal.
Step 2: Prepare the Batter
- In a large mixing bowl, cream together the softened butter and sugar until light and fluffy, about 3-4 minutes.
- Add the eggs one at a time, beating well after each addition. Stir in the vanilla and almond extracts until combined.
Step 3: Mix the Dry Ingredients
- In a separate bowl, whisk together the flour and salt. Gradually add the dry ingredients to the wet mixture, mixing just until combined. Avoid overmixing to keep the bars tender.
Step 4: Assemble the Bars
- Spread about 2/3 of the batter into the prepared baking dish, smoothing it out to cover the bottom evenly.
- Spoon the cherry pie filling over the batter, spreading it evenly across the entire surface.
- Drop the remaining batter by spoonfuls over the cherry filling. The batter will spread slightly during baking, creating a beautiful marbled effect.
Step 5: Bake the Bars
- Bake in the preheated oven for 30-35 minutes, or until the top is lightly golden and a toothpick inserted into the center comes out clean or with a few moist crumbs.
Step 6: Cool and Serve
- Allow the bars to cool completely in the baking dish. Once cooled, dust with powdered sugar if desired, then cut into squares or bars for serving.
🍽 Cook’s Notes & Tips
- Butter Softness: Ensure your butter is properly softened for easier mixing and a smoother batter.
- Almond Extract: The almond extract enhances the flavor, but if you prefer a more classic taste, you can omit it or increase the vanilla extract.
- Cherry Filling: If you prefer a more generous cherry layer, feel free to use an additional can of cherry pie filling.
- Serving Suggestions: These bars pair wonderfully with a scoop of vanilla ice cream or a dollop of whipped cream.
Variations of Irresistible Cherry Pie Bars
Here are a few ways to customize this recipe:
- Lemon Cherry Bars: Add the zest of one lemon to the batter for a refreshing citrus flavor that complements the cherries.
- Cream Cheese Cherry Bars: Swirl softened cream cheese into the batter before adding the cherry filling for a creamy, tangy contrast.
- Nutty Cherry Bars: Sprinkle chopped almonds or pecans over the cherry filling before adding the top layer of batter for added texture and flavor.
- Chocolate Cherry Bars: Add 1/2 cup of mini chocolate chips to the batter for a chocolatey twist that pairs well with the cherries.
Frequently Asked Questions (FAQs)
1. Can I use homemade cherry pie filling?
Yes, homemade cherry pie filling works perfectly in this recipe. Just ensure it’s thick enough to hold its shape during baking.
2. How should I store Cherry Pie Bars?
Store the bars in an airtight container at room temperature for up to 3 days or in the refrigerator for up to a week. They can also be frozen for up to 3 months.
3. Can I make these bars gluten-free?
Yes, simply substitute the all-purpose flour with a gluten-free flour blend. Make sure the blend includes xanthan gum or a similar binding agent.
4. How do I prevent the bars from sticking to the pan?
Lining the pan with parchment paper is the easiest way to prevent sticking. Alternatively, you can grease the pan with butter or non-stick cooking spray.
5. Can I use different fruit fillings?
Absolutely! This recipe works well with any canned or homemade pie filling, such as blueberry, apple, or peach.
6. Can I double the recipe?
Yes, you can double the recipe and bake it in two 9×13-inch pans. Adjust the baking time as needed, and make sure to check for doneness with a toothpick.
7. How can I make the bars more cake-like?
For a more cake-like texture, you can add an extra egg to the batter, which will make the bars lighter and fluffier.
A Must-Try Dessert for Cherry Lovers
Irresistible Cherry Pie Bars are a delightful and easy-to-make dessert that combines the best elements of a pie and a cake into one delicious treat. With a buttery crust, sweet and tart cherry filling, and a tender, cake-like topping, these bars are sure to be a hit with everyone who tries them.
Perfect for any occasion, these bars can be customized to suit your taste and are easy to store and serve. Whether you’re making them for a special event or just because, these Cherry Pie Bars are a sweet indulgence you’ll want to make again and again!
