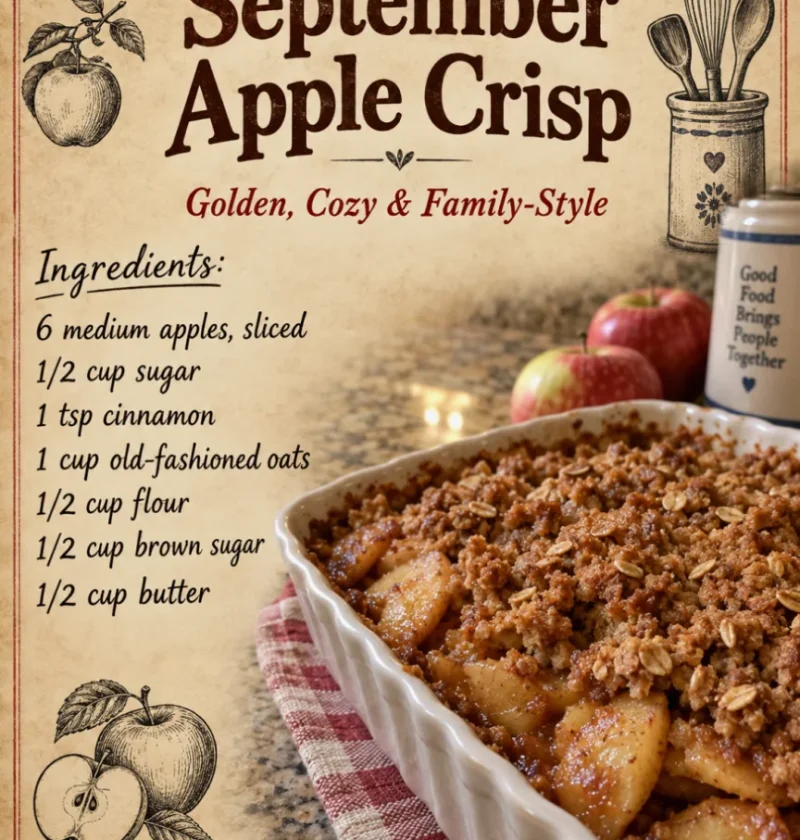
As the crisp air of September rolls in, it brings with it the delightful promise of fall flavors, particularly the warm, inviting essence of apples. The September Apple Crisp is a quintessential dish that celebrates this seasonal bounty, offering a comforting blend of sweet, tart apples topped with a rich, buttery crumble. This dessert not only warms the heart but also fills the home with an intoxicating aroma that beckons friends and family to gather around the table. The combination of sweet apples, just the right amount of spice, and a crunchy topping creates a symphony of flavors and textures that is both satisfying and comforting. Whether you’re winding down after a long day or celebrating a cozy gathering, this easy apple dessert captures the spirit of fall and is a perfect addition to your collection of fall dessert recipes. Did you know that apple crisp has its roots in early American cuisine? It was originally created as a way to use up abundant apple harvests, making it a delicious and practical dessert that has stood the test of time. This connection to the past adds a rich layer of tradition to every bite you take! The September Apple Crisp not only showcases the versatility of apples but also gives you a reason to embrace the changing seasons with its delicious warmth.
Ingredients
To prepare this delightful September Apple Crisp, you will need the following ingredients:
- For the Apple Filling:
- 6 cups of fresh apples, peeled, cored, and sliced (about 6-8 medium apples, such as Granny Smith or Honeycrisp). Choose apples that are firm and slightly tart for the best flavor contrast against the sweetness of the topping. Mixing varieties heightens the flavor profile and enhances the overall experience. For instance, combining the crisp texture of Granny Smith with the sweetness of Honeycrisp creates a delightful balance.
- 1 tablespoon lemon juice. This helps to prevent the apples from browning and adds a bright note to the flavor. The acidity of the lemon juice also helps balance out the sweetness of the apples and sugar, ensuring a more vibrant and flavorful filling that keeps the dish lively.
- 1/2 cup granulated sugar. Adjust this to your taste depending on the sweetness of your apples. If you’re using sweeter apples like Fuji, consider reducing the sugar slightly to avoid an overly sweet filling. This careful adjustment allows the natural flavors of the apples to shine through.
- 1 teaspoon cinnamon. Adds warmth and depth; feel free to increase this for a more pronounced spice flavor. The cinnamon not only enhances the taste but also contributes to the enticing aroma wafting from your oven, enveloping your kitchen in the smell of fall.
- 1/4 teaspoon nutmeg (optional). Nutmeg provides a lovely aromatic quality that complements the cinnamon beautifully. This spice adds a subtle depth that can make your crisp feel extra special, offering a hint of warmth that lingers pleasantly on the palate.
- 2 tablespoons all-purpose flour. This helps to thicken the filling as it bakes, ensuring your crisp isn’t too runny. If you prefer a thicker filling, you might increase this slightly, but be cautious as too much can change the filling’s texture, making it gummy instead of pleasantly saucy.
- For the Crisp Topping:
- 1 cup rolled oats. Use old-fashioned oats for a heartier texture, which enhances the crunchiness of the topping. Steel-cut oats are not recommended as they require longer cooking times and won’t achieve the crispy texture you desire. Old-fashioned oats absorb moisture while retaining a satisfying chewiness, which is perfect for this recipe.
- 1 cup all-purpose flour (or gluten-free flour for a gluten-free option). If opting for gluten-free flour, ensure it’s a 1:1 baking blend for the best results, as this will mimic the properties of regular flour more closely. This inclusion makes the September Apple Crisp accessible to those with dietary restrictions.
- 1/2 cup brown sugar, packed. Brown sugar contributes a rich flavor and moisture to the topping. You can also use light or dark brown sugar depending on the depth of flavor you prefer; dark brown sugar will lend a more robust caramel flavor.
- 1/2 cup unsalted butter, melted. The melted butter combines with the dry ingredients to create a delightful crumbly texture that is essential for a good crisp topping. Be sure not to use margarine, as butter provides the best flavor and texture.
- 1/2 teaspoon salt. Balances the sweetness and enhances the overall flavor profile. A pinch of salt can really elevate the flavors, making them pop, while also contrasting beautifully with the sweet apple filling.
- 1 teaspoon cinnamon. Adding this to the topping ties the flavors together, ensuring every bite is deliciously spiced. Cinnamon in the topping complements the spiced apple filling perfectly, creating a cohesive and comforting flavor experience.
Note: Feel free to mix and match apples for a more complex flavor profile. A combination of tart and sweet apples works wonderfully in this baked apple dessert. Consider using some tart Granny Smith apples for their acidity and sweetness from Honeycrisp or Fuji apples for a balanced filling. Check out our related guide for more tips on selecting the best apples for baking and achieving the perfect balance of flavors. The right apple selection can make all the difference in the final taste of your September Apple Crisp, transforming it from good to exceptional.
Steps / Instructions
- Preheat your oven to 350°F (175°C). This temperature allows the apples to soften beautifully while the topping becomes crisp and golden brown. Ensure your oven is fully preheated to avoid uneven baking, which can affect the texture of both the filling and topping. Take a moment to check your oven thermometer if you have one, as precise temperature can make a significant difference.
- In a large mixing bowl, combine the sliced apples with lemon juice, granulated sugar, cinnamon, nutmeg (if using), and flour. Toss until the apples are evenly coated. This step is crucial as it ensures that the apples absorb the flavors of the sugar and spices, creating a delicious filling that will enhance the overall taste of the September Apple Crisp. Properly coating the apples also helps prevent them from becoming mushy, keeping a pleasant texture. Allow the mixture to sit for 5 minutes to let the flavors meld before moving on to the next step.
- Transfer the apple mixture into a greased 9×13-inch baking dish, spreading it evenly. Make sure the apples are distributed well; they will shrink while cooking, leaving a delicious filling beneath the crisp topping. Press the apples down slightly to pack them in, ensuring they cook evenly. If you like a thicker layer of filling, you can use a smaller dish, which will also allow the apples to cook down more. This step is key for achieving a juicy and flavorful apple filling.
- In another bowl, prepare the crisp topping by mixing rolled oats, flour, brown sugar, melted butter, salt, and cinnamon. Stir until crumbly and well-combined. The melted butter will help bind the dry ingredients together, creating a delightful texture. You should be able to see small clumps form, which will bake up to be wonderfully crunchy. If the mixture seems too dry, a touch more melted butter can help achieve the desired consistency. Aim for a crumbly mixture that resembles coarse sand for the best texture.
- Sprinkle the oat mixture generously over the apple filling, ensuring an even coverage. This will form a crunchy layer that contrasts nicely with the soft apples. If you prefer a thicker topping, feel free to increase the amounts of oats and flour slightly. Remember, the more topping you add, the crunchier it will be! Take care to cover all exposed apple slices, as this will help prevent them from cooking too quickly and becoming mushy.
- Bake in the preheated oven for 35-40 minutes, or until the topping is golden brown and the filling is bubbly. A visual cue for doneness is the bubbling of the apple juice around the edges, indicating that the filling is properly cooked. If the topping browns too quickly, cover it loosely with aluminum foil for the remainder of the baking time to prevent burning. This will help maintain a nice golden color without overcooking the apples. Keep an eye on it towards the end; every oven varies slightly.
- Remove from the oven and allow to cool for at least 10 minutes before serving. This cooling time lets the filling set a bit, making it easier to serve. You can serve it warm or at room temperature, depending on your preference. A scoop of vanilla ice cream or a dollop of whipped cream can elevate the experience even more! Additionally, drizzling some caramel sauce on top transforms the September Apple Crisp into an indulgent treat.
Tips & Tricks
To achieve the best results with your September Apple Crisp, consider these tips:
- Storage: Leftover apple crisp can be stored in an airtight container in the refrigerator for up to 3 days. Reheat in the oven at 350°F (175°C) for about 10 minutes to restore its crispy topping. Alternatively, you can microwave individual portions for quick reheating, but the oven works best for keeping the topping crunchy. Proper storage is key to maintaining the delightful textures that make this dish so enjoyable. For longer storage, consider freezing the crisp, letting it cool completely, and then wrapping it tightly.
- Make Ahead: You can prepare the apple filling a day in advance and store it covered in the refrigerator. Assemble the crisp topping just before baking to maintain its texture. This is especially helpful when hosting guests, allowing you to enjoy more time with them rather than in the kitchen. Having the filling ready can also enhance the flavors, as it gives the spices time to meld with the apples. If you do this, just give the filling a stir before placing it in the baking dish.
- Common Mistakes: Avoid oversaturating the apples with sugar, as they will release their own juices while baking. Always taste your apple mixture before adding the full amount of sugar to ensure it’s to your liking. Also, be mindful of the baking time; overbaking can lead to a dry topping that loses its appealing crispiness. Watch the topping closely; if it’s golden brown and the apples are bubbling, it’s ready!
- Pro Technique: For an extra layer of flavor, consider adding chopped nuts or shredded coconut to the topping mixture. This adds a delightful crunch and enhances the overall taste. Pecans or walnuts pair beautifully with the flavors of apple crisp, providing a nutty contrast that complements the sweet and spiced filling perfectly. You can also experiment with adding spices like ginger or allspice for added complexity.
Conclusion
With its warm spices and comforting flavors, the September Apple Crisp is an ideal dessert for the fall season. This recipe not only highlights the deliciousness of fresh apples but also provides a simple yet satisfying way to enjoy them. Gather your loved ones and savor each bite of this delightful homemade apple crisp, a true celebration of autumn! Don’t forget to share your own twists on the recipe, and we would love to hear how your September Apple Crisp turned out! Enjoy the process, and most importantly, enjoy the wonderful tastes of the season, bringing everyone together in delicious harmony.
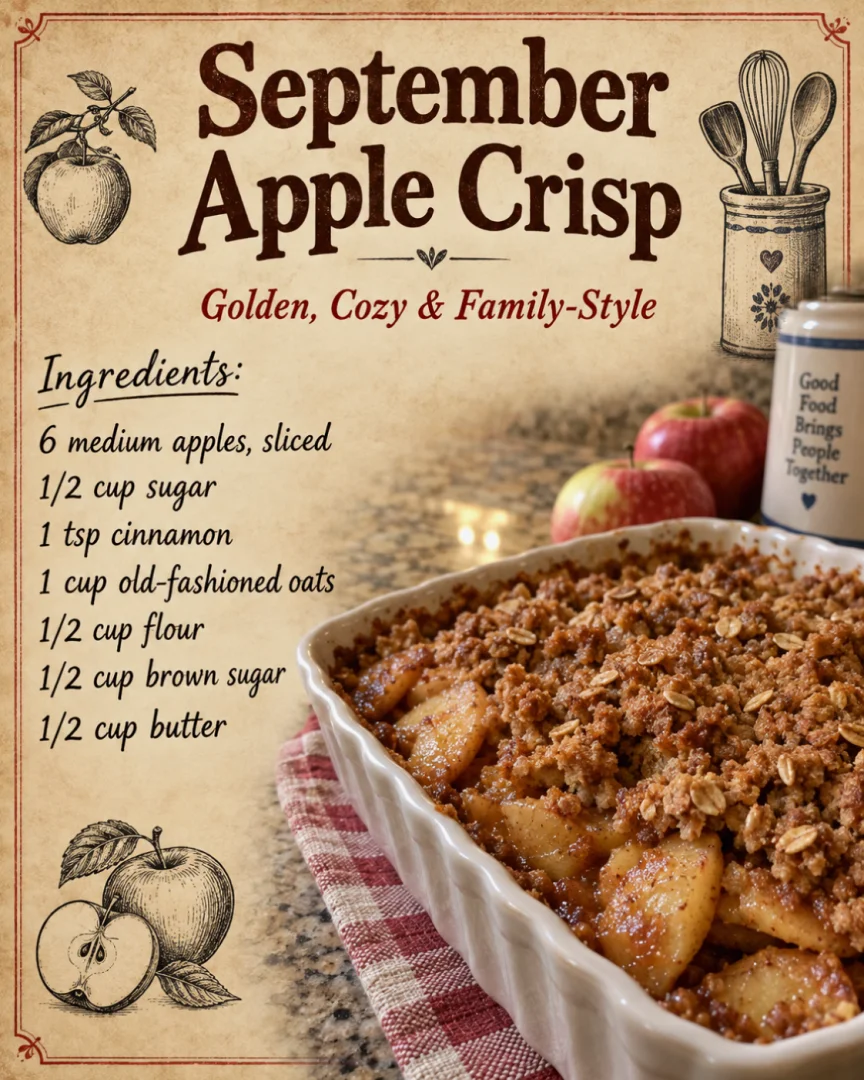
September Apple Crisp
A quintessential dish that celebrates the seasonal bounty of apples, offering a comforting blend of sweet, tart apples topped with a rich, buttery crumble.
Ingredients
- 6 cups of fresh apples, peeled, cored, and sliced (about 6-8 medium apples, such as Granny Smith or Honeycrisp)
- 1 tablespoon lemon juice
- 1/2 cup granulated sugar
- 1 teaspoon cinnamon
- 1/4 teaspoon nutmeg (optional)
- 2 tablespoons all-purpose flour
- 1 cup rolled oats
- 1 cup all-purpose flour (or gluten-free flour for a gluten-free option)
- 1/2 cup brown sugar, packed
- 1/2 cup unsalted butter, melted
- 1/2 teaspoon salt
- 1 teaspoon cinnamon
Directions
Preheat your oven to 350°F (175°C).
In a large mixing bowl, combine the sliced apples with lemon juice, granulated sugar, cinnamon, nutmeg (if using), and flour. Toss until the apples are evenly coated.
Transfer the apple mixture into a greased 9x13-inch baking dish, spreading it evenly.
In another bowl, prepare the crisp topping by mixing rolled oats, flour, brown sugar, melted butter, salt, and cinnamon. Stir until crumbly and well-combined.
Sprinkle the oat mixture generously over the apple filling, ensuring an even coverage.
Nutrition Facts
Recipe Reviews
- ★★★★★
Excellent recipe!
Leave a Reply
Your email address will not be published. Required fields are marked *