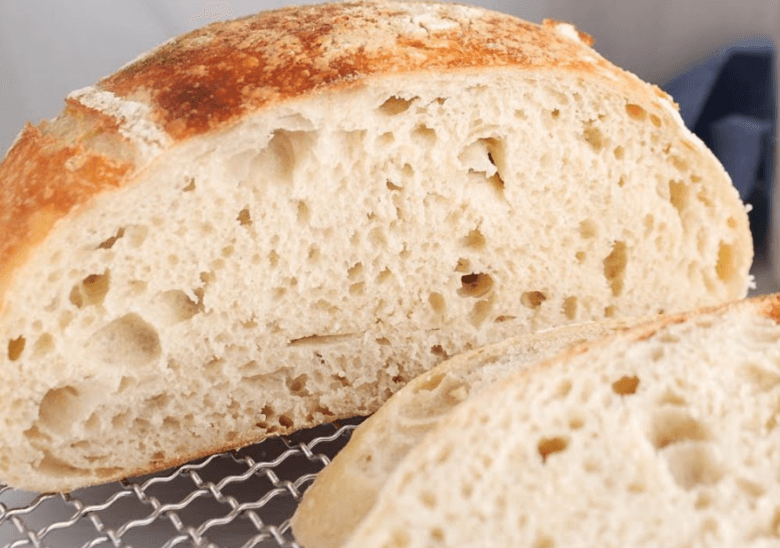
Easy Sourdough Bread for Beginners (No Knead, No Stretch)
Ingredients:
- 100 g sourdough starter (100% hydration)
- 325 g water
- 500 g bread flour
- 10 g salt
Instructions:
Preparing the Dough:
- Mix the Ingredients:
- In a large mixing bowl, combine 100 g of sourdough starter and 325 g of water. Stir well until the starter is fully dissolved in the water.
- Add 500 g of bread flour to the mixture. Mix until the flour is fully incorporated and a rough dough forms.
- Cover the bowl with a damp cloth or plastic wrap and let it sit at room temperature for about 30 minutes to allow the flour to hydrate. This step is known as autolyse.
- Add Salt:
- After the autolyse period, sprinkle 10 g of salt over the dough.
- Mix the salt into the dough by pinching and folding until it is evenly distributed. The dough will be sticky, but that’s normal.
Bulk Fermentation:
- First Rise:
- Cover the bowl with a damp cloth or plastic wrap and let the dough rest at room temperature for about 6-8 hours, or until it has doubled in size. This is the bulk fermentation stage.
- Stretch and Fold (Optional):
- While this is a no-knead, no-stretch recipe, if you want to develop the gluten further, you can perform a few sets of stretch and folds during the bulk fermentation period. To do this, wet your hands, gently lift one side of the dough, and fold it over the top. Rotate the bowl and repeat on all four sides. Perform this 2-3 times at 30-minute intervals.
Shaping and Proofing:
- Shape the Dough:
- Once the dough has doubled in size, gently turn it out onto a lightly floured surface.
- Shape the dough into a round or oval loaf by folding the edges towards the center and then flipping it over. Gently shape it with your hands, being careful not to deflate the dough too much.
- Final Proof:
- Place the shaped dough into a proofing basket or a bowl lined with a floured cloth, seam side up.
- Cover with a damp cloth or plastic wrap and let it proof for 2-4 hours at room temperature, or overnight in the refrigerator for a slower fermentation and more complex flavor.
Baking:
- Preheat the Oven:
- Place a Dutch oven or a heavy oven-safe pot with a lid in the oven and preheat it to 250°C (475°F) for at least 30 minutes.
- Score the Dough:
- Carefully turn the proofed dough out onto a piece of parchment paper.
- Using a sharp knife or a bread lame, score the top of the dough with a few slashes. This allows the bread to expand and bake evenly.
- Bake the Bread:
- Carefully transfer the dough on the parchment paper into the preheated Dutch oven.
- Cover with the lid and bake for 20 minutes.
- After 20 minutes, remove the lid and reduce the oven temperature to 220°C (425°F). Bake for an additional 20-25 minutes, or until the crust is golden brown and the bread sounds hollow when tapped on the bottom.
- Cool the Bread:
- Remove the bread from the oven and transfer it to a wire rack to cool completely before slicing.
Tips:
- Sourdough Starter: Make sure your sourdough starter is active and bubbly before using it in this recipe. Feed it 4-6 hours before you plan to start making the dough.
- Hydration: This recipe uses a high hydration dough, which can be sticky to work with. Use wet hands or a dough scraper to handle the dough more easily.
- Proofing Time: Adjust the proofing time based on the temperature of your kitchen. Warmer temperatures will shorten the proofing time, while cooler temperatures will lengthen it.
Frequently Asked Questions:
1. Can I use whole wheat flour instead of bread flour?
- Yes, you can substitute a portion of the bread flour with whole wheat flour for a heartier loaf. Start with replacing 100-150 g of bread flour with whole wheat flour.
2. How do I know when the dough has finished proofing?
- The dough is ready when it has visibly risen and feels slightly airy to the touch. You can also perform the “poke test” – gently poke the dough with your finger, and if the indentation springs back slowly, it’s ready to bake.
3. Can I freeze the baked sourdough bread?
- Yes, you can freeze the baked loaf. Let it cool completely, then wrap it tightly in plastic wrap and place it in a freezer bag. It can be frozen for up to 3 months.
4. What should I do if my dough is too sticky?
- High hydration dough can be sticky. Use wet hands or a dough scraper to handle the dough. If it’s excessively sticky, you can add a little more flour during the shaping process.
Enjoy your homemade sourdough bread! Share your baking experience and leave a comment below. Happy baking!


